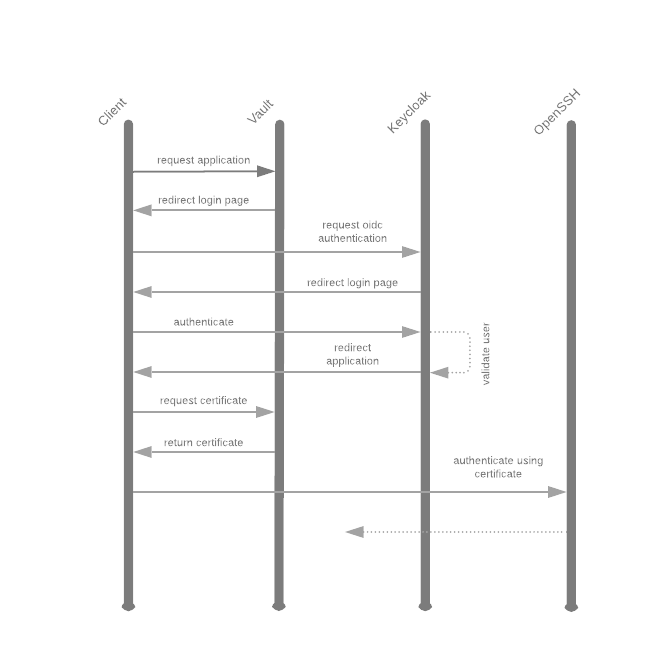
The perfect SSH login flow
Use Hashicorp Vault ssh signers to issue certificates for authorized users.
Looking to implement the perfect login flow for SSH? Let's setup OpenSSH Server Certificate Authentication using signed certificates from Hashicorp Vault issued after authenticating to the Vault against a Keycloak OIDC client.
Setup
For local development we'll use kind to deploy keycloak and vault,
and docker-compose to deploy coredns and an openssh-server.
kind
We bootstrap a Kubernetes in Docker cluster using kind and bootstrap the cluster with cert-manager and ingress-nginx.
# Create the kind cluster
cat <<EOF | sudo kind create cluster --config=-
apiVersion: kind.x-k8s.io/v1alpha4
kind: Cluster
nodes:
- role: control-plane
  kubeadmConfigPatches:
  - |
    kind: InitConfiguration
    nodeRegistration:
      kubeletExtraArgs:
        node-labels: "ingress-ready=true"
        authorization-mode: "AlwaysAllow"
  extraPortMappings:
  - containerPort: 80
    hostPort: 80
    protocol: TCP
  - containerPort: 443
    hostPort: 443
    protocol: TCP
EOF

# Install ingress-nginx
kubectl apply -f https://raw.githubusercontent.com/kubernetes/ingress-nginx/master/deploy/static/provider/kind/deploy.yaml
kubectl wait --namespace ingress-nginx \
  --for=condition=ready pod \
  --selector=app.kubernetes.io/component=controller \
  --timeout=90s

# Install cert-manager
helm repo add jetstack https://charts.jetstack.io
kubectl create namespace cert-manager
helm install --namespace cert-manager cert-manager \
    --version v1.2.0 \
    --set installCRDs=true \
    --wait \
    jetstack/cert-manager

# Create a SelfSigned ClusterIssuer
cat <<EOF |kubectl apply -f -
apiVersion: cert-manager.io/v1alpha2
kind: ClusterIssuer
metadata:
  name: selfsigned
spec:
  selfSigned: {}
EOF
keycloak
We use keycloak as the OIDC provider (or relay). Install keycloak in the kind cluster using helm.
# Create secrets for the deployment
kubectl create namespace keycloak
kubectl create secret -n keycloak generic keycloak-postgresql \
    --from-literal=postgresql-password=$(openssl rand -base64 32) \
    --from-literal=postgresql-replication-password=$(openssl rand -base64 32)
kubectl create secret -n keycloak generic keycloak \
    --from-literal=KEYCLOAK_USER=keycloak \
    --from-literal=KEYCLOAK_PASSWORD=$(openssl rand -base64 32)

# Create the values file
cat <<EOF >> values.yaml
extraEnvFrom: |
  - secretRef:
      name: keycloak
extraEnv: |
  - name: PROXY_ADDRESS_FORWARDING
    value: "true"
EOF

# Install the codecentric/keycloak chart
helm repo add codecentric https://codecentric.github.io/helm-charts
helm repo update
helm upgrade --install --namespace keycloak keycloak \
    --set ingress.enabled=true \
    --set ingress.rules[0].host="keycloak.lazybit.ch" \
    --set ingress.rules[0].paths[0]=/ \
    --set ingress.tls[0].hosts[0]="keycloak.lazybit.ch" \
    --set ingress.tls[0].secretName=tls-keycloak \
    --set ingress.annotations."kubernetes\.io/ingress\.class"=nginx \
    --set ingress.annotations."cert-manager\.io/cluster-issuer"=selfsigned \
    --set ingress.console.enabled=true \
    --set ingress.console.rules[0].host="keycloak.lazybit.ch" \
    --set ingress.console.rules[0].paths[0]="/auth/admin" \
    --set persistence.dbVendor=postgres \
    --set persistence.deployPostgres=true \
    --set existingSecret=keycloak \
    --set postgresql.existingSecret=keycloak-postgresql \
    --set postgresql.postgresqlUser=keycloak \
    --set postgresql.image.debug=true \
    --set postgresql.postgresqlDatabase=keycloak \
    --set postgresql.persistence.enabled=true \
    --set postgresql.replication.enabled=false \
    -f values.yaml \
    --wait \
    codecentric/keycloak
Note: add an entry in your
/etc/hostsfile to resolvekeycloak.lazybit.ch127.0.0.1 localhost keycloak.lazybit.ch
Tip: access the
keycloakadmin (https://keycloak.lazybit.ch/auth/admin) using the default credentials.kubectl get secrets -n keycloak keycloak \ -o jsonpath={.data.KEYCLOAK_USER} |base64 -d kubectl get secrets -n keycloak keycloak \ -o jsonpath={.data.KEYCLOAK_PASSWORD} |base64 -d
-
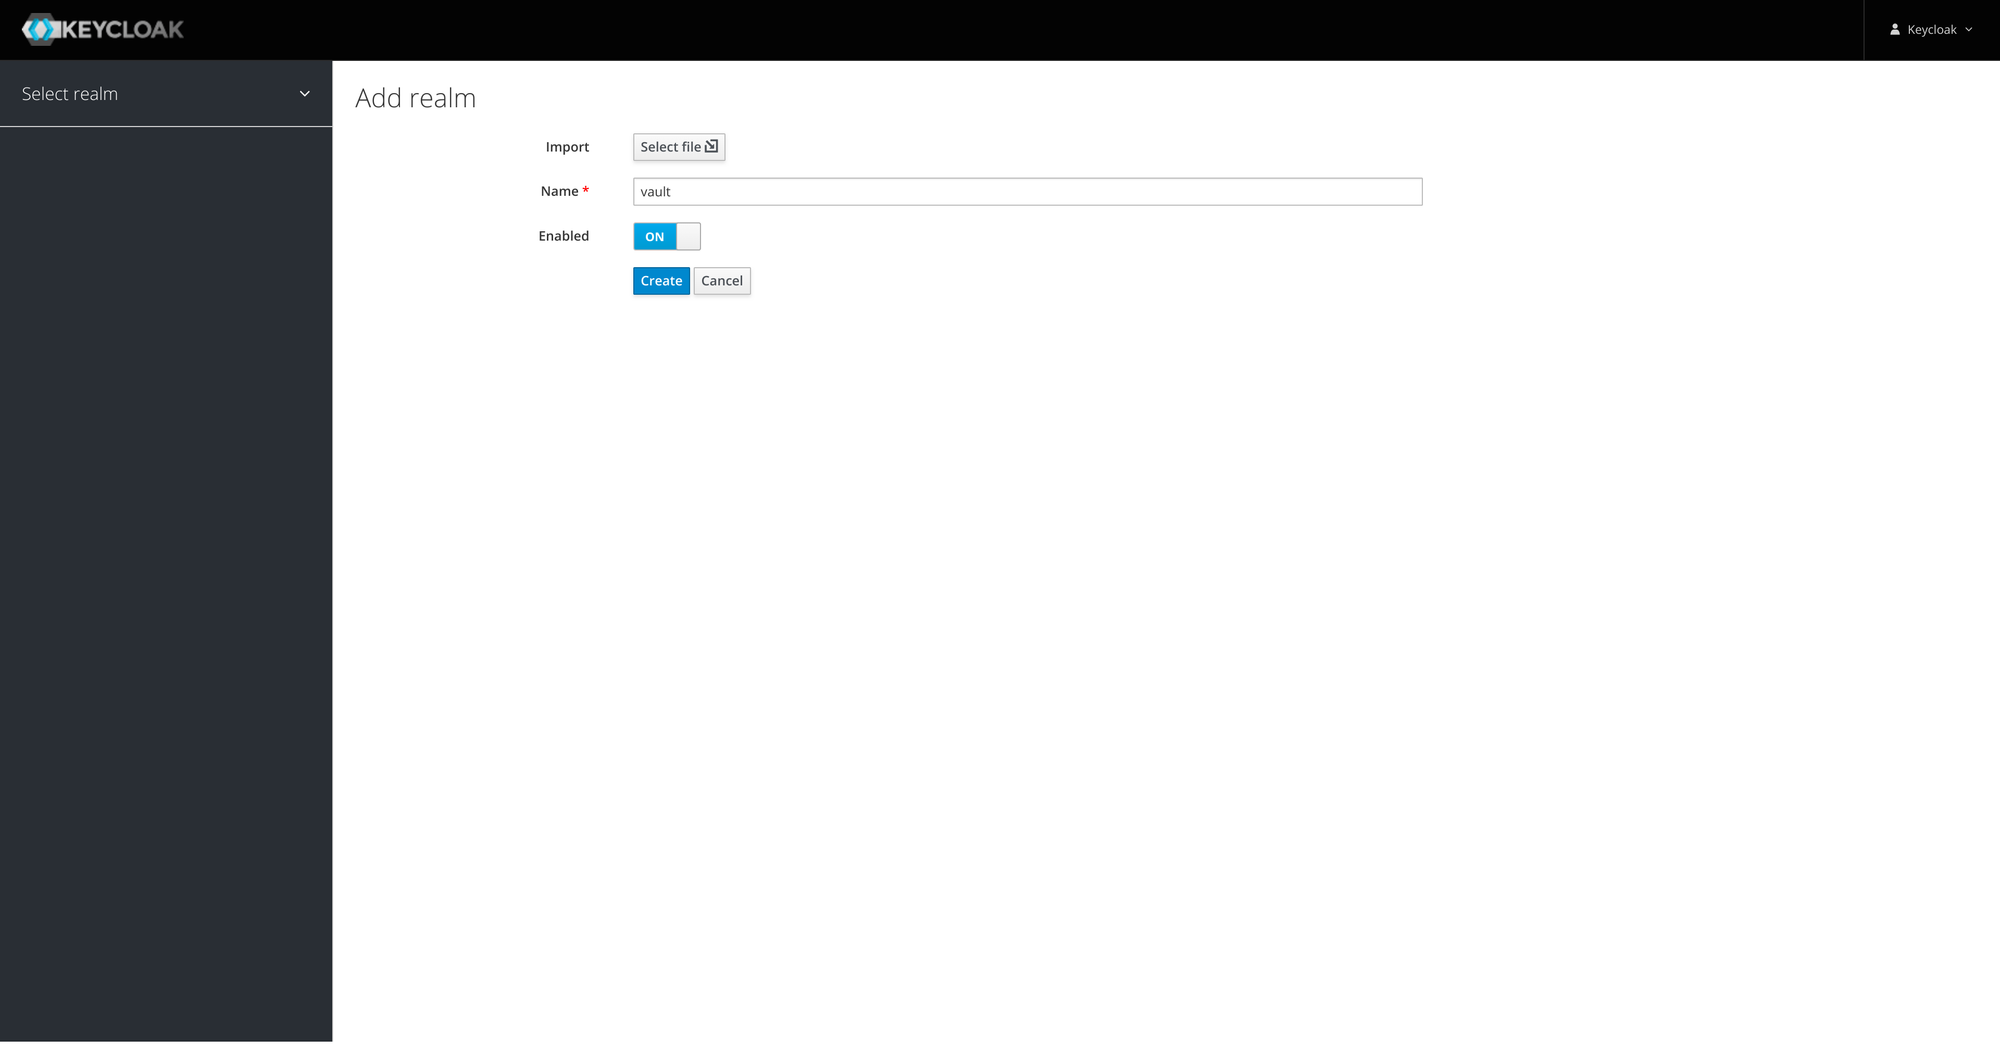
Create the
vaultrealm
-
Create a confidential
vaultclient
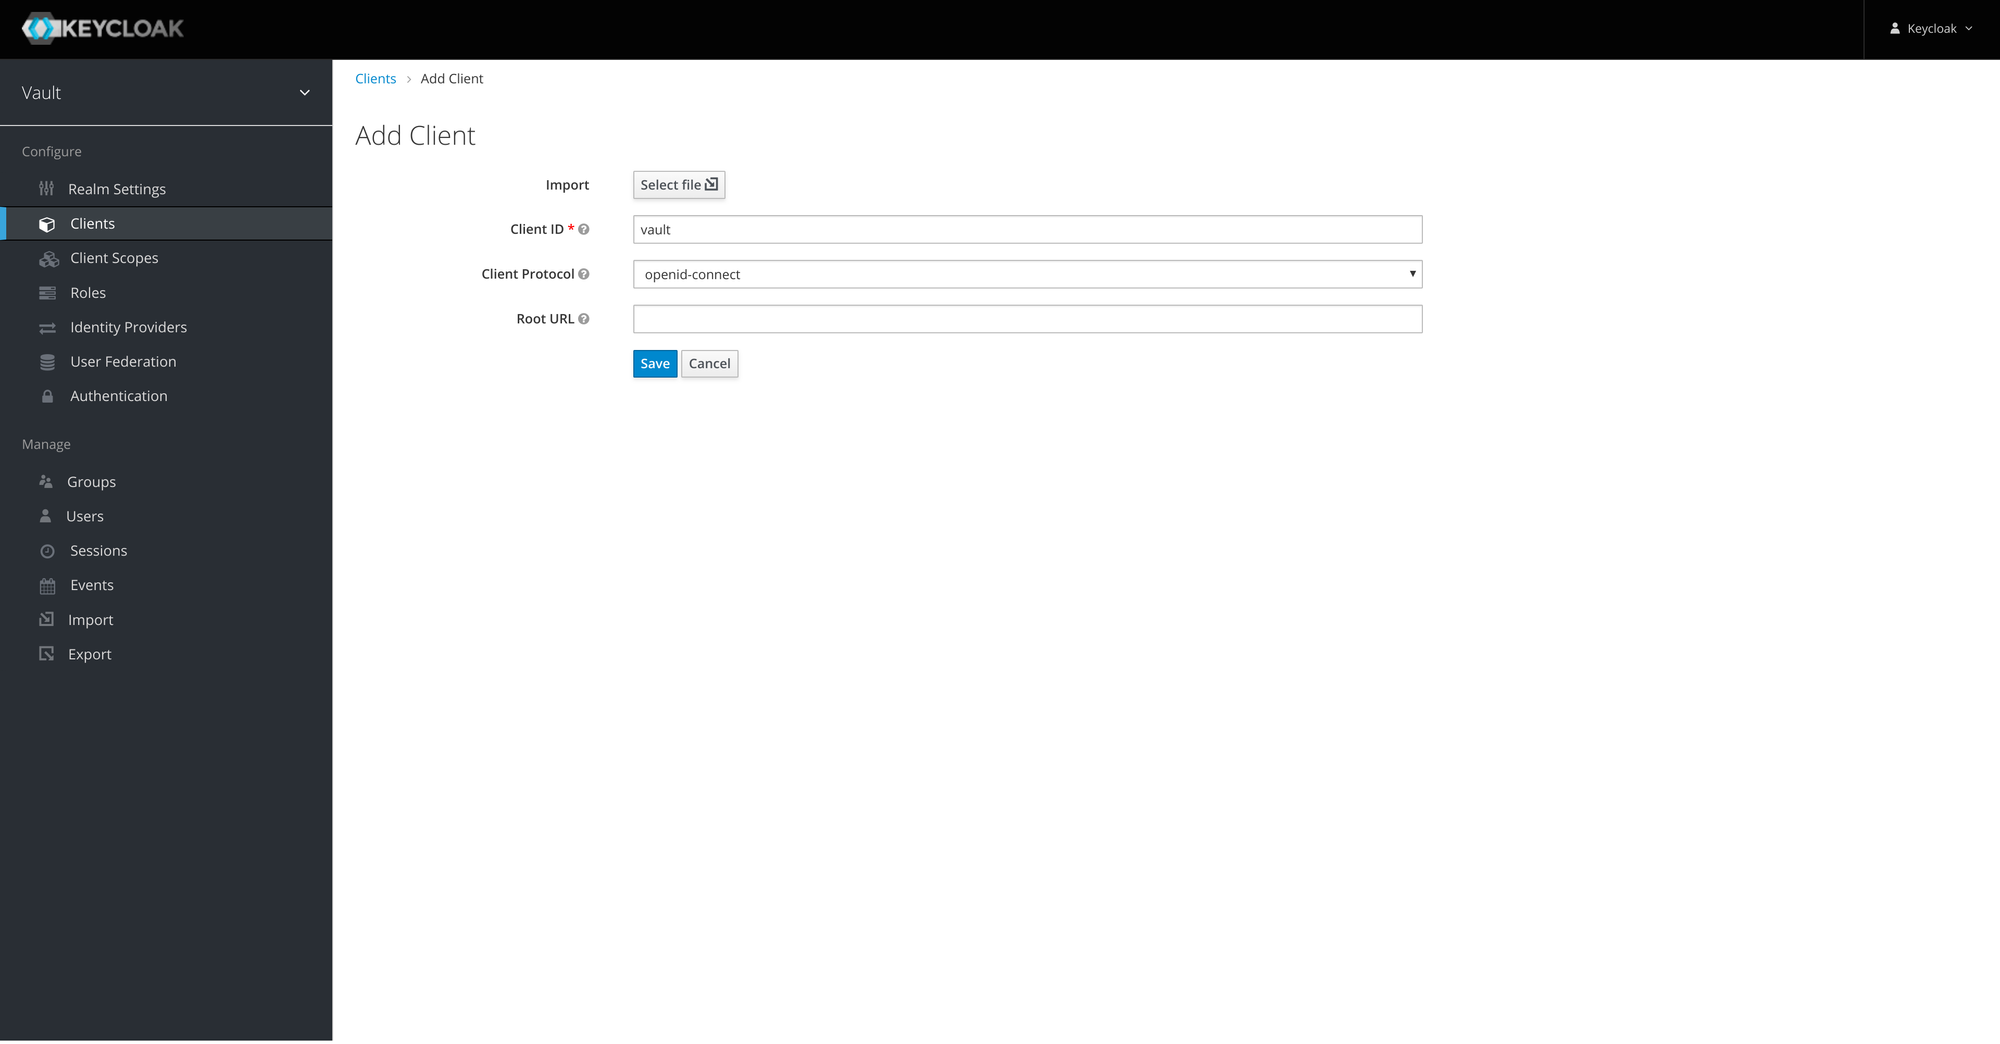
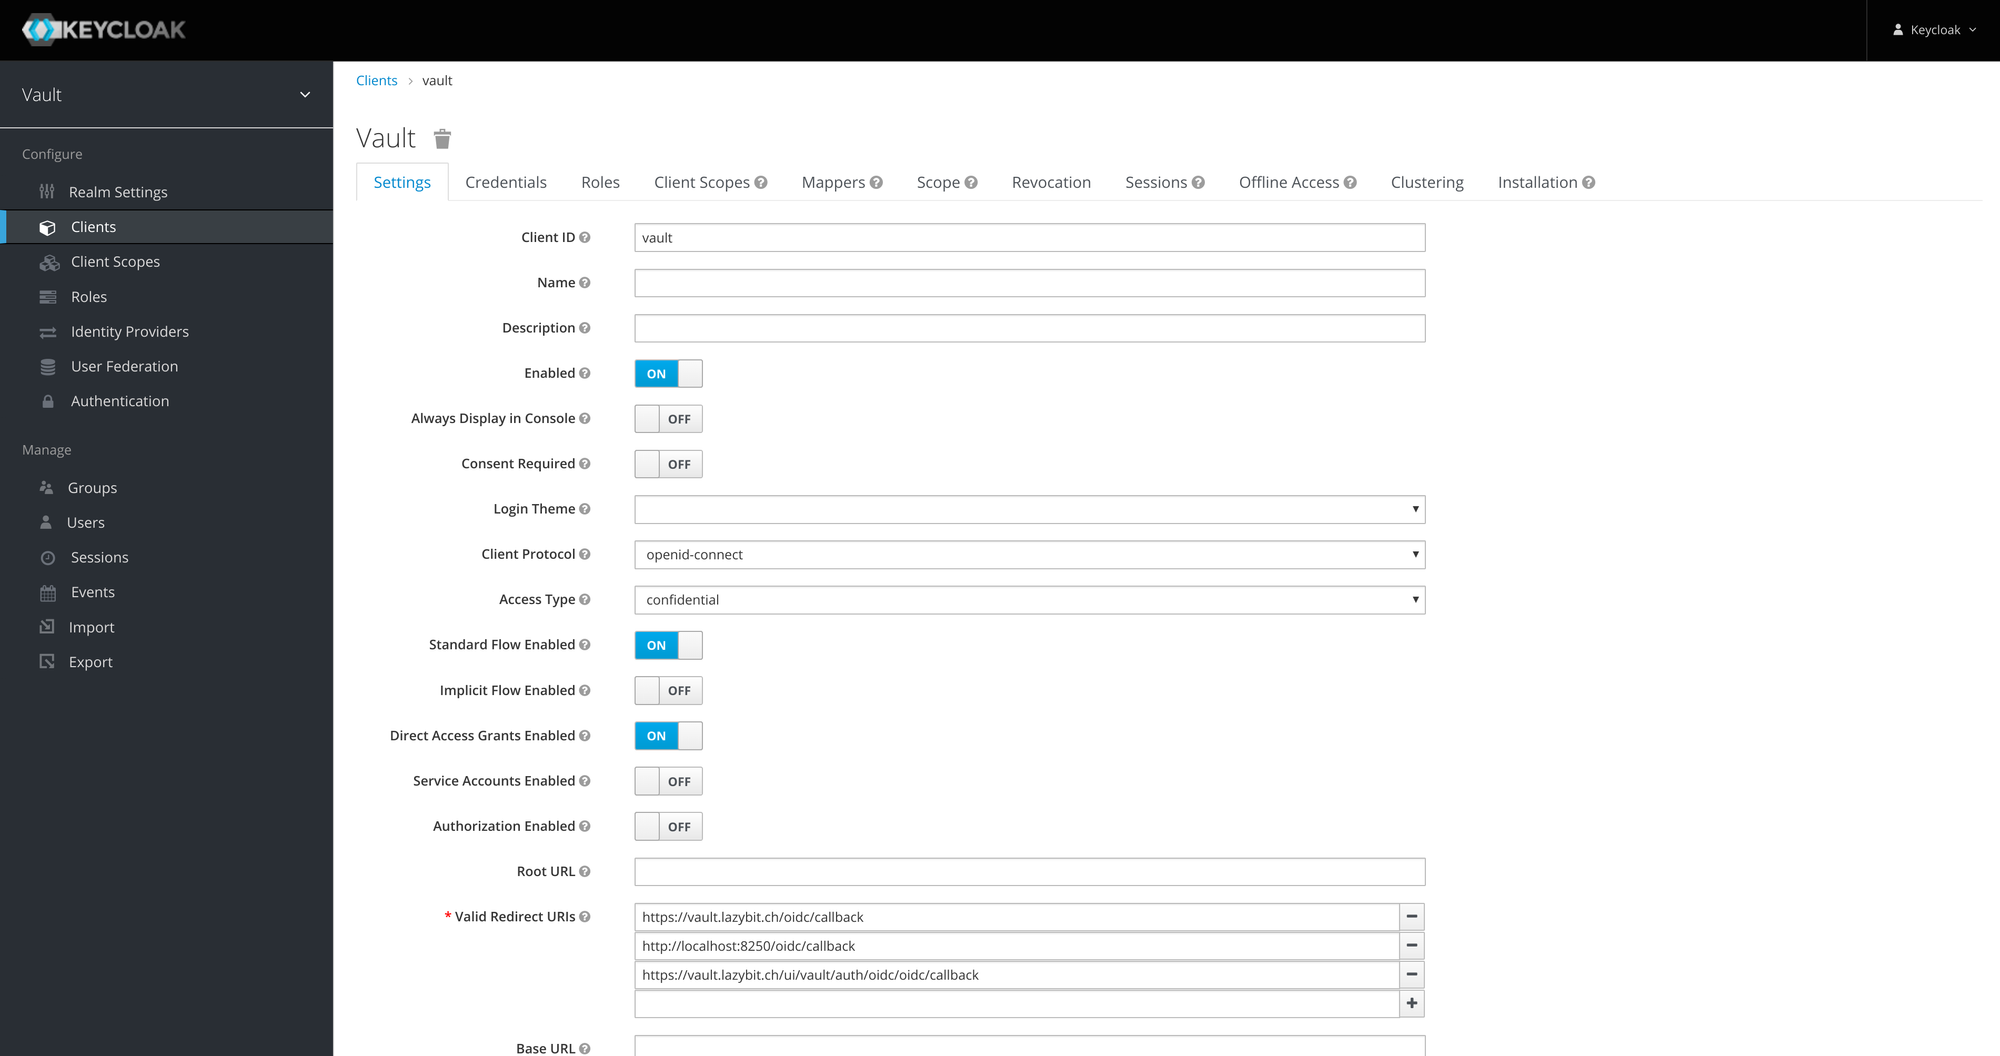
Note: save the client secret (
Credentials>Secret).
- Create a user with credentials
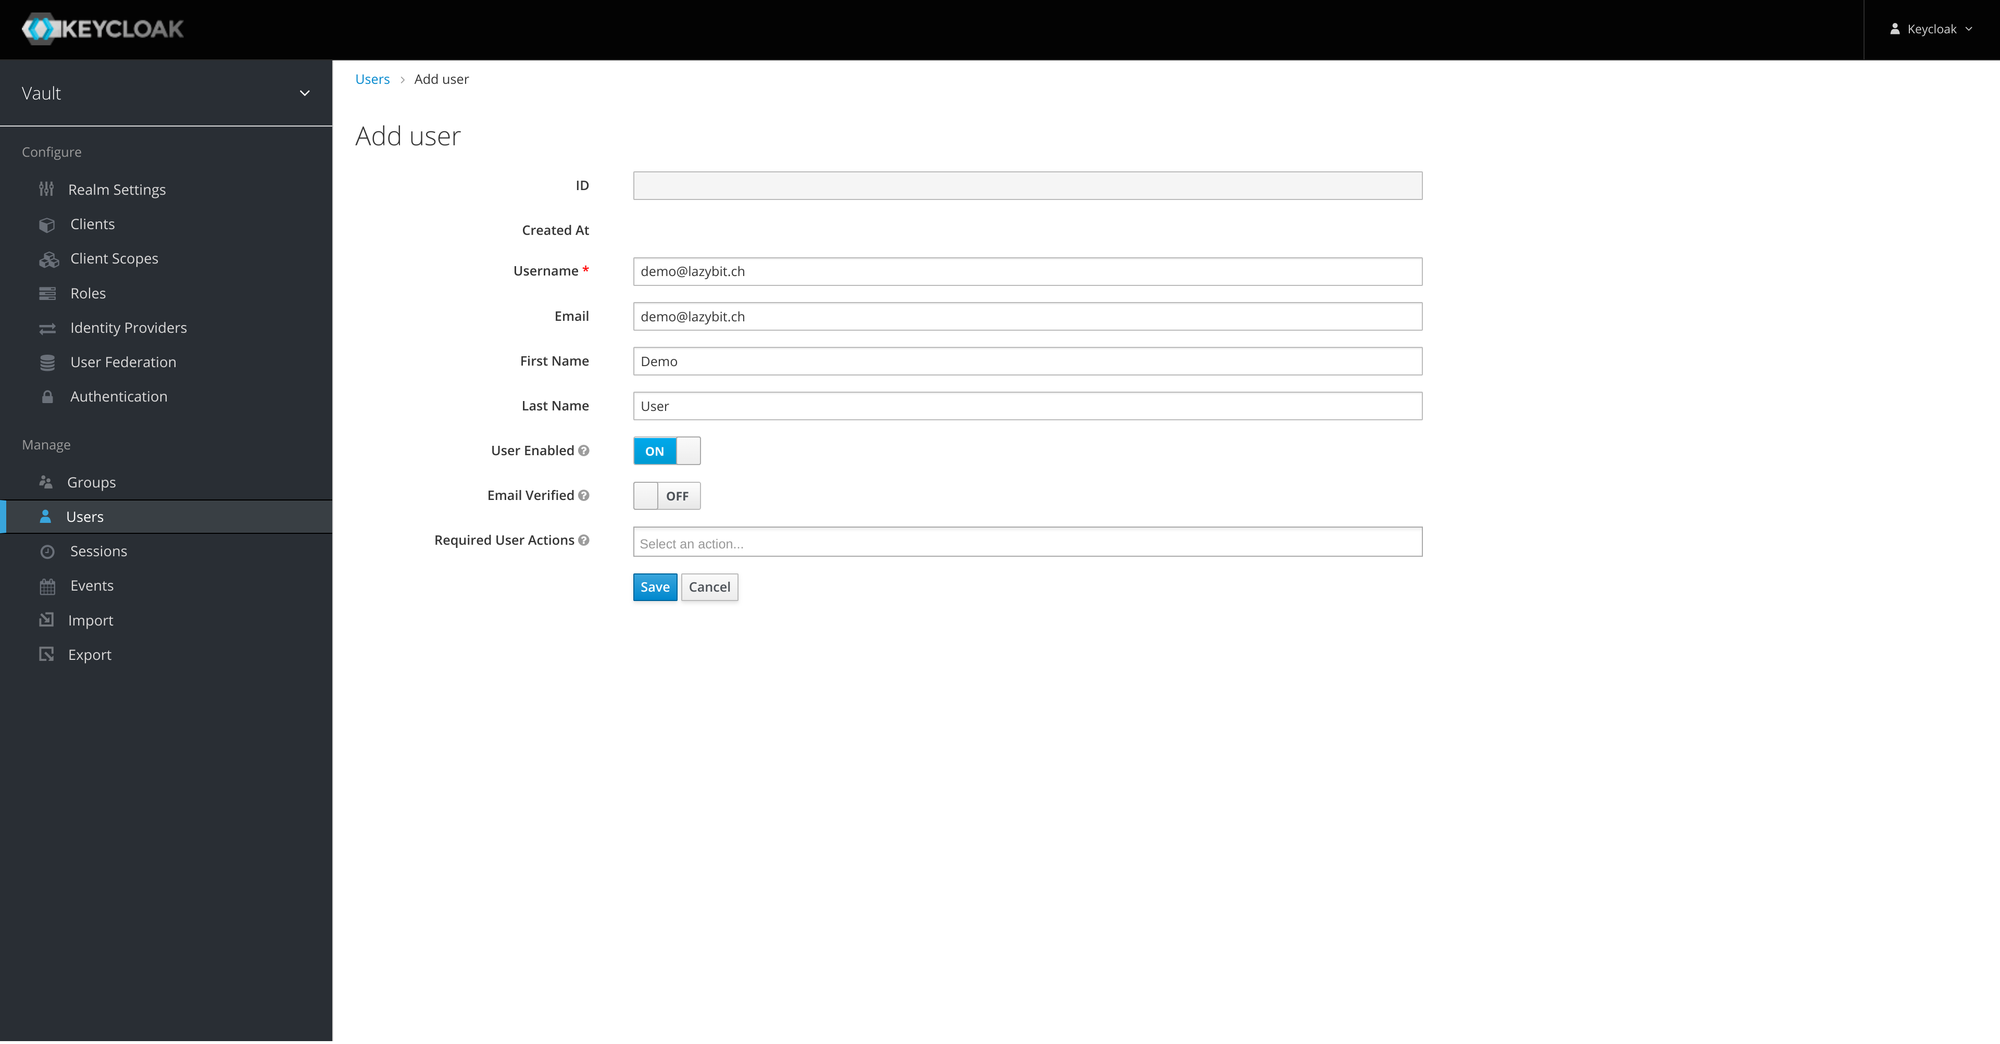
Note: add credentials for the user.
coredns
We use coredns to resolve requests for services running in our private cluster. We need it for requests from vault to keycloak when configuring the oidc provider. CoreDNS can run in docker orchestrated using docker-compose.
version: '3.7'
services:
  coredns:
    image: 'coredns/coredns:1.8.3'
    network_mode: 'host'
    volumes:
    - './Corefile:/Corefile'
    - './db.lazybit.ch:/db.lazybit.ch'
Our Corefile configures coredns to resolve requests for lazybit.ch:
lazybit.ch:1053 {
    log
    errors
    file db.lazybit.ch
}
The db file adds records for keycloak and vault to resolve to the IP of
the kind-control-plane container:
$ORIGIN lazybit.ch.
@	3600 IN	SOA sns.dns.icann.org. noc.dns.icann.org. (
				2017042745 ; serial
				7200       ; refresh (2 hours)
				3600       ; retry (1 hour)
				1209600    ; expire (2 weeks)
				3600       ; minimum (1 hour)
				)

	3600 IN NS a.iana-servers.net.
	3600 IN NS b.iana-servers.net.

keycloak    IN A     ${CONTAINER_IP}
vault       IN A     ${CONTAINER_IP}
Note: replace
${CONTAINER_IP}with the IP of thekind-control-plane.
Tip: get the
kind-control-planecontainer's IPdocker inspect kind-control-plane \ --format {{.NetworkSettings.Networks.kind.IPAddress}}
Edit the coredns ConfigMap (kubectl edit cm -n kube-system coredns), forward requests from lazybit.ch:53 to HOST_IP:1053. Bounce the coredns pods to reload the config (kubectl delete pod -n kube-system -l k8s-app=kube-dns).
apiVersion: v1
data:
  Corefile: |
    .:53 {
        ...
    }
    lazybit.ch:53 {
        log
        errors
        forward . ${HOST_IP}:1053
    }
kind: ConfigMap
...
Note: replace
${HOST_IP}with the IP of your host.
Vault
We configure vault with the jwt/oidc authentication model and enable the SSH Secrets Engine. Install vault in the kind cluster using helm.
# Install the hashicorp/vault chart
helm repo add hashicorp https://helm.releases.hashicorp.com
helm repo update
kubectl create namespace vault
helm upgrade --install -n vault vault \
    --set ui.enabled=true \
    --set server.ingress.enabled=true \
    --set server.ingress.annotations."kubernetes\.io/ingress\.class"=nginx \
    --set server.ingress.annotations."cert-manager\.io/cluster-issuer"=selfsigned \
    --set server.ingress.hosts[0].host="vault.lazybit.ch" \
    --set server.ingress.hosts[0].paths[0]=/ \
    --set server.ingress.tls[0].hosts[0]="vault.lazybit.ch" \
    --set server.ingress.tls[0].secretName=tls-vault \
    hashicorp/vault
Note: add an entry in your
/etc/hostsfile to resolvevault.lazybit.ch127.0.0.1 localhost vault.lazybit.ch
Connect to the Vault UI then initialize and unseal the vault.
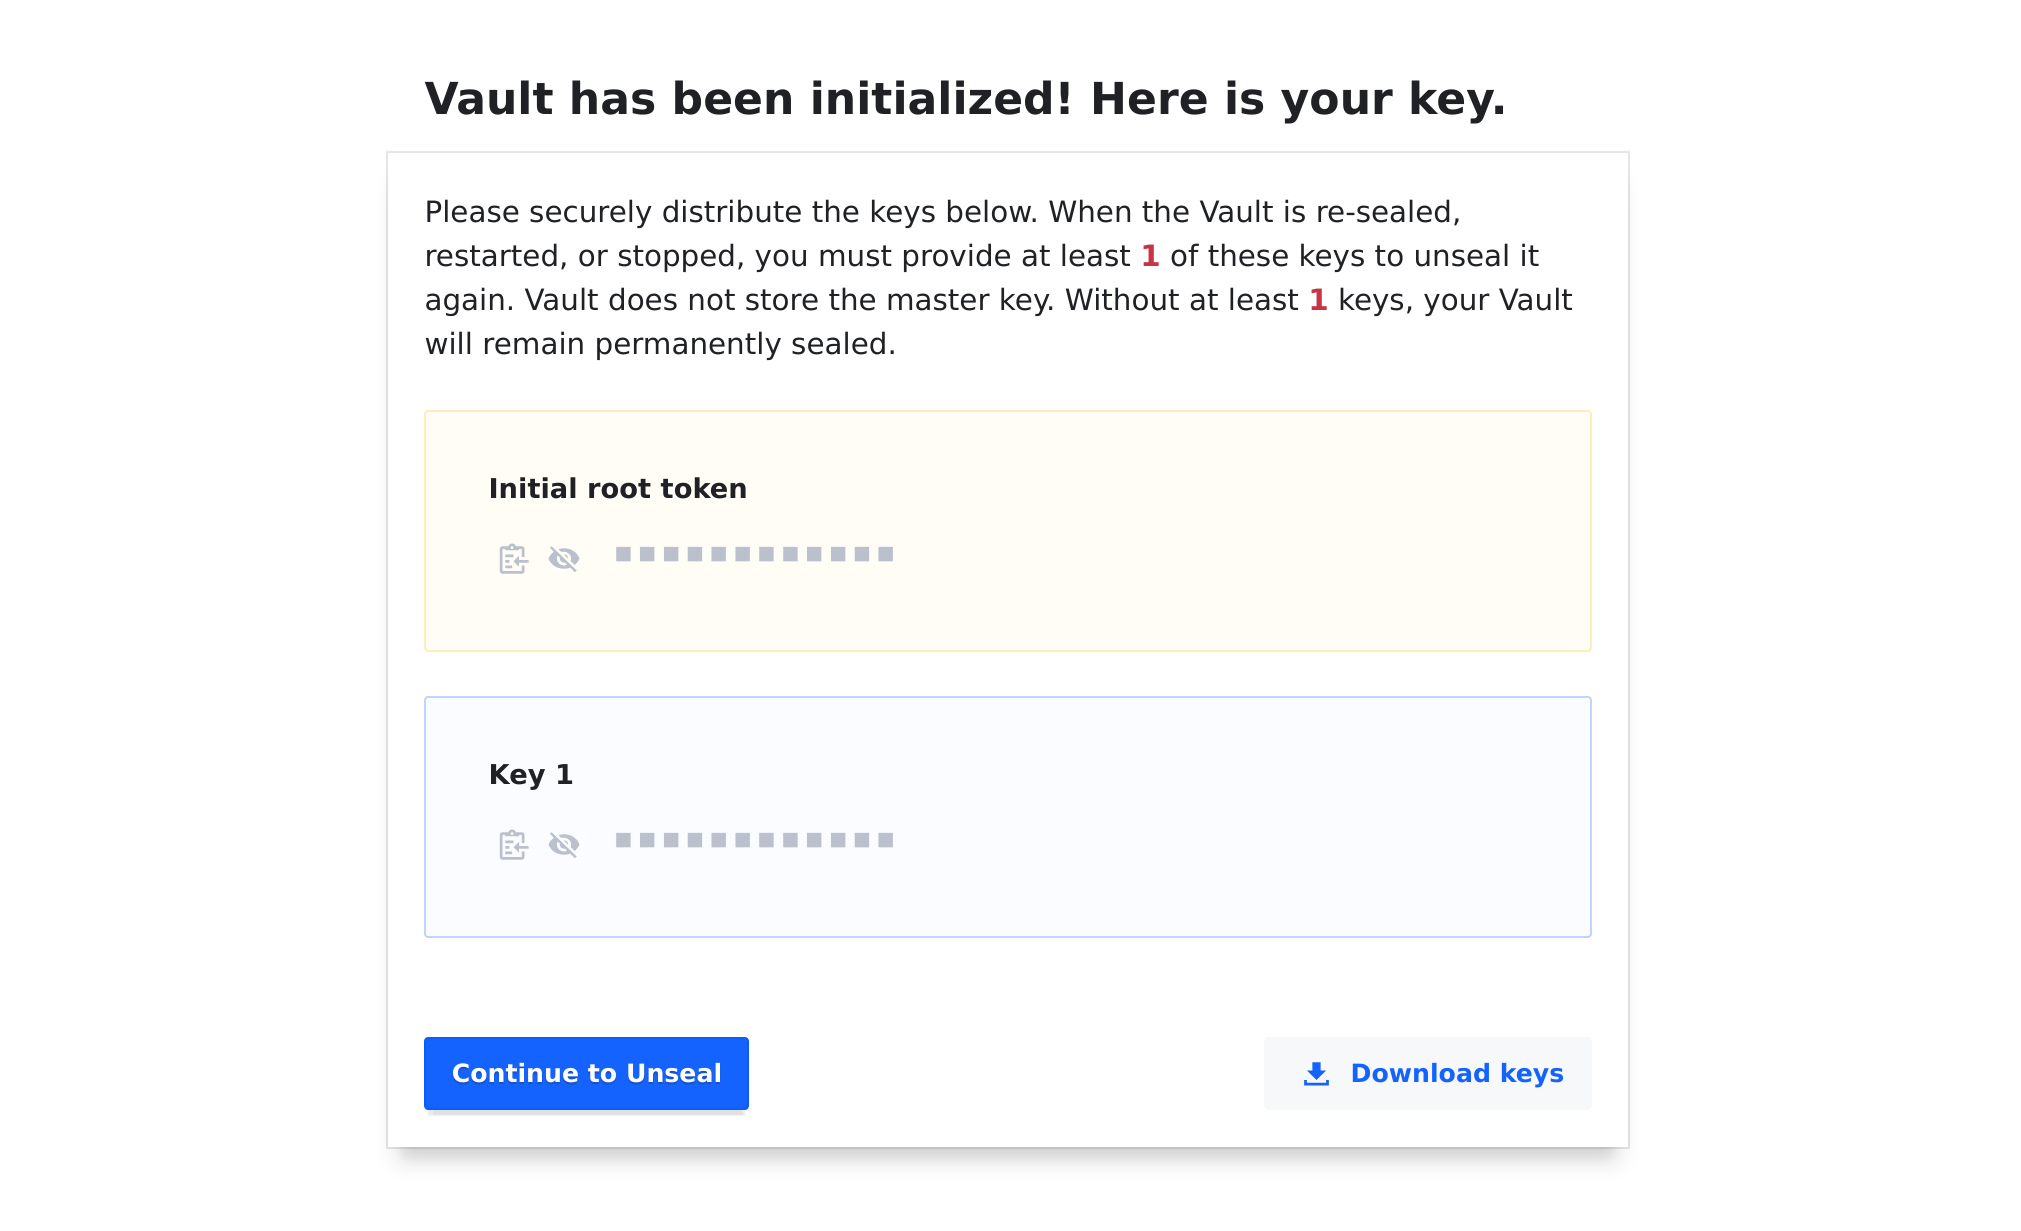
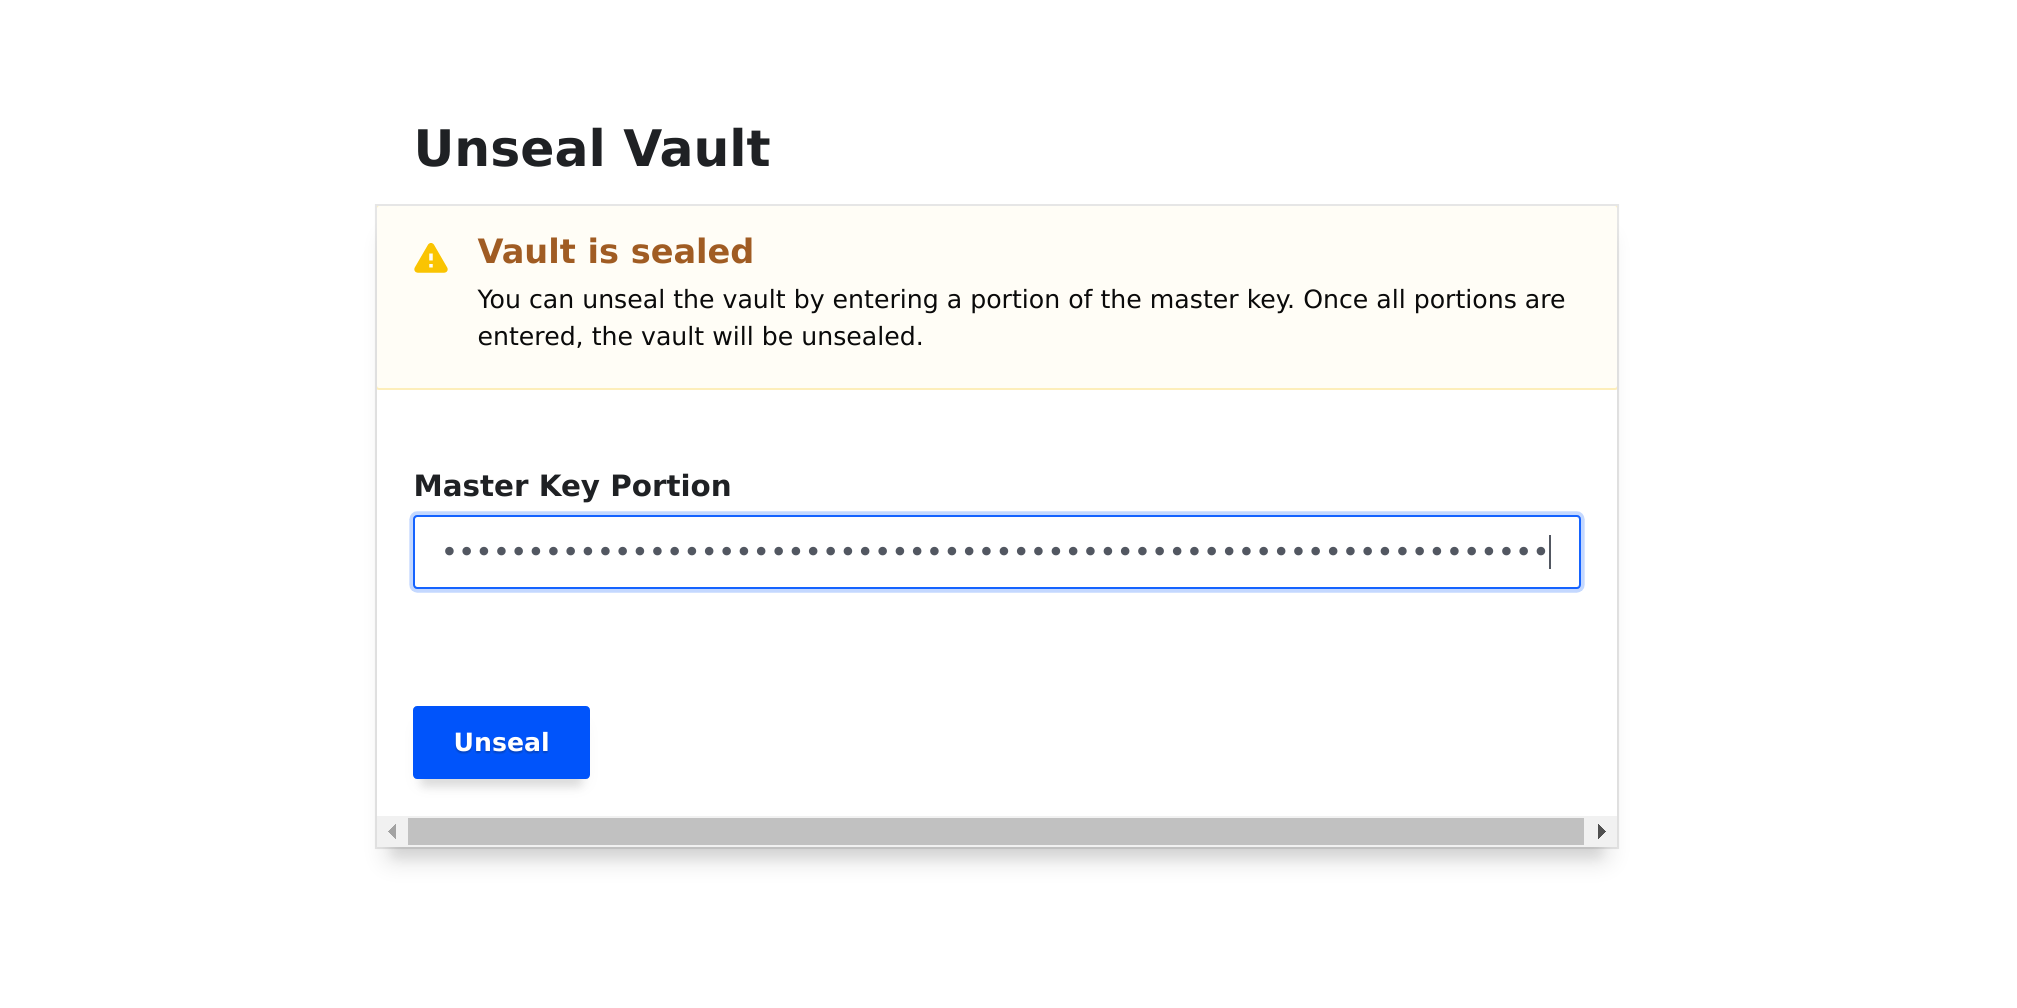
Once the vault is unsealed we need to configure OIDC authentication and a SSH Certificate signer.
- Configure the default
vaultpolicy for users toread,updateandlistthessh/sign/sshpath for obtaining signed certificates
# default.hcl
...
path "ssh/sign/ssh" {
    capabilities = ["read", "list", "update"]
}
Tip: get the default policy to amend from vault using
vault policy read default.
- Get a copy of the CA Certificate securing the
keycloakdeployment
kubectl get secrets tls-keycloak \
    -n keycloak \
    -o jsonpath={.data."ca\.crt"} | base64 -d > ca.crt
- Connect to the
vaultthen configureoidcand thesshpath
# Set the keycloak client secret
export CLIENT_SECRET=800577cd-e7eb-42de-8bc1-53b8d17a16c1

# Set the vault token
export VAULT_TOKEN=s.Fgyg55cvQifzO179QFxoqhmd

# Run a Vault CLI container
docker run --rm -it --name vault-cli \
    -v ${PWD}/ca.crt:/ca.crt \
    -v ${PWD}/default.hcl:/default.hcl \
    --entrypoint ash \
    -e VAULT_SKIP_VERIFY=true \
    -e VAULT_ADDR=https://vault.lazybit.ch \
    -e CLIENT_SECRET=${CLIENT_SECRET} \
    -e VAULT_TOKEN=${VAULT_TOKEN} \
    --network host \
    vault:1.7.0

# Enable the oidc backend
vault auth enable oidc
vault write auth/oidc/config \
    oidc_discovery_url="https://keycloak.lazybit.ch/auth/realms/vault" \
    oidc_client_id="vault" \
    oidc_client_secret="${CLIENT_SECRET}" \
    default_profile="default" \
    oidc_discovery_ca_pem="$(cat ca.crt)"

# Update the default role
vault write auth/oidc/role/default \
    allowed_redirect_uris="https://vault.lazybit.ch/ui/vault/auth/oidc/oidc/callback" \
    allowed_redirect_uris="https://vault.lazybit.ch/oidc/callback" \
    user_claim="email" \
    policies="default" \
    oidc_scopes="profile"

# Update the default policy
vault policy write default default.hcl

# Enable the ssh path
vault secrets enable -path=ssh ssh
vault write ssh/config/ca generate_signing_key=true
vault read -field=public_key ssh/config/ca > ca.pem
vault write ssh/roles/ssh -<<EOF
{
  "allow_user_certificates": true,
  "allowed_users": "*",
  "allowed_extensions": "permit-pty,permit-port-forwarding",
  "default_extensions": [
    {
      "permit-pty": ""
    }
  ],
  "key_type": "ca",
  "default_user": "ubuntu",
  "ttl": "30m0s"
}
EOF

# Exit the Vault CLI container
exit
OpenSSH
We can spin up a quick openssh-server using our openssh-server images deployed to Docker Hub.
.
├── docker-compose.yaml
└── etc
    └── ssh
Server
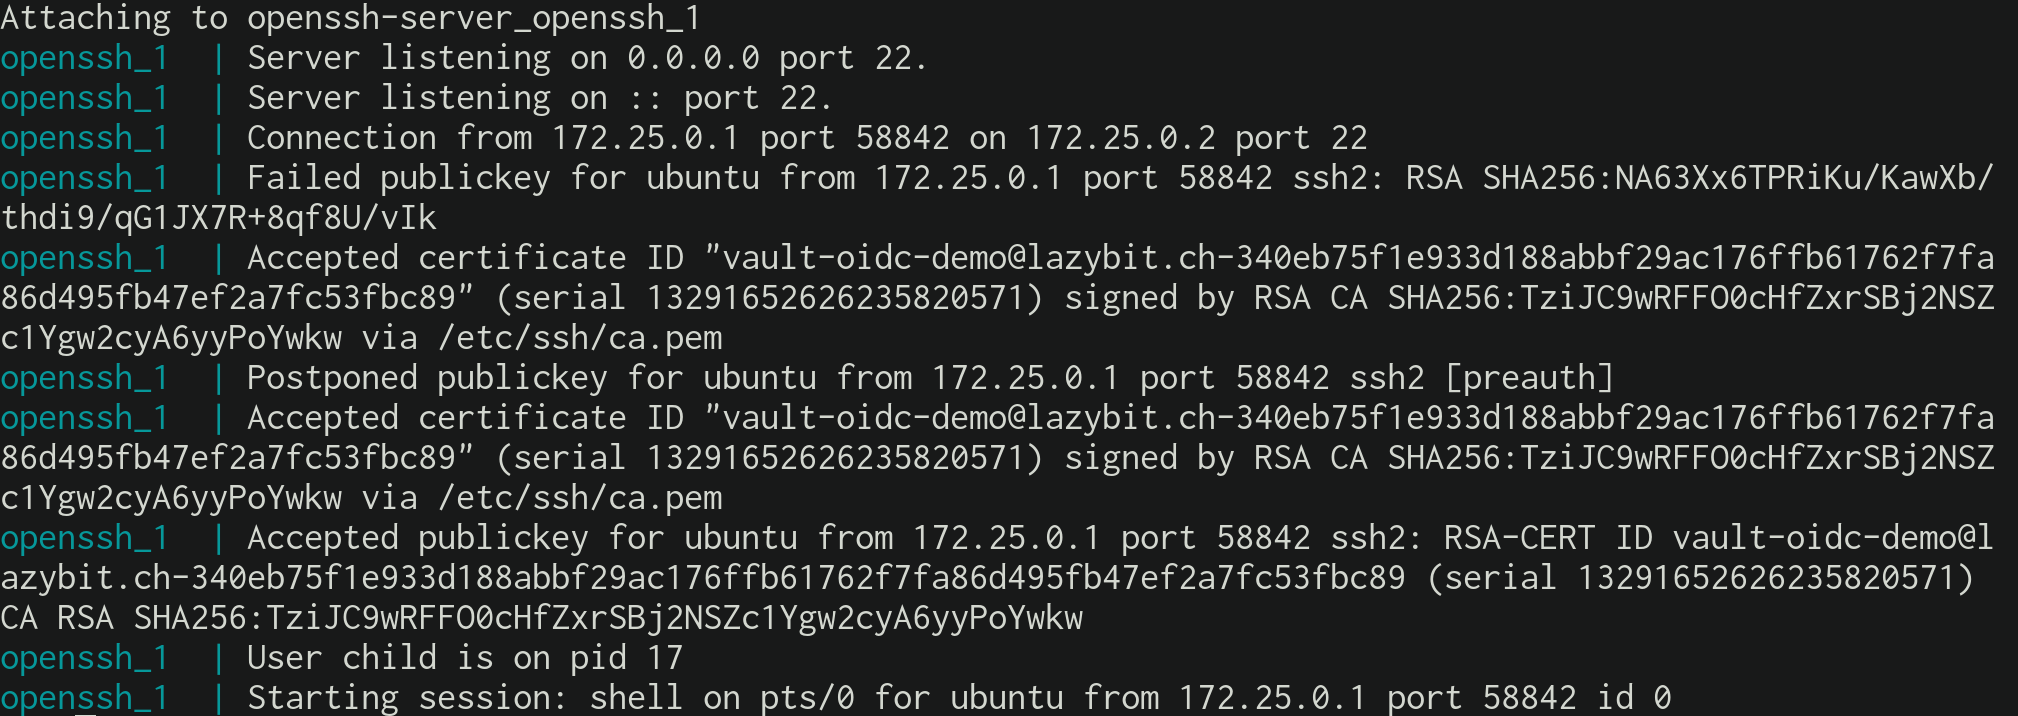
We need to configure the server to trust the public certificate.
-
Copy the
ca.pemfrom thevault-clicontainer
docker cp vault-cli:/ca.pem etc/ssh/ca.pem -
Configure
openssh-serverto trust the certificate
docker create --name openssh lazybit/openssh-server
docker cp openssh:/etc/ssh/sshd_config etc/ssh/sshd_config
docker container rm openssh
echo "TrustedUserCAKeys /etc/ssh/ca.pem" | tee -a etc/ssh/sshd_config
- Run the
openssh-serverusingdocker-composemounting theca.pemand customsshd_config
version: '3.7'
services:
  openssh:
    image: 'lazybit/openssh-server'
    container_name: 'openssh'
    hostname: 'openssh'
    domainname: 'lazybit.ch'
    restart: 'always'
    volumes:
    - 'openssh:/etc/ssh'
    - './etc/ssh/sshd_config:/etc/ssh/sshd_config:ro'
    - './etc/ssh/ca.pem:/etc/ssh/ca.pem:ro'
    cap_add:
    - 'SYS_CHROOT'
    - 'SETGID'
    - 'SETUID'
    - 'CHOWN'
    ports:
    - '22:22'
volumes:
  openssh:
Client
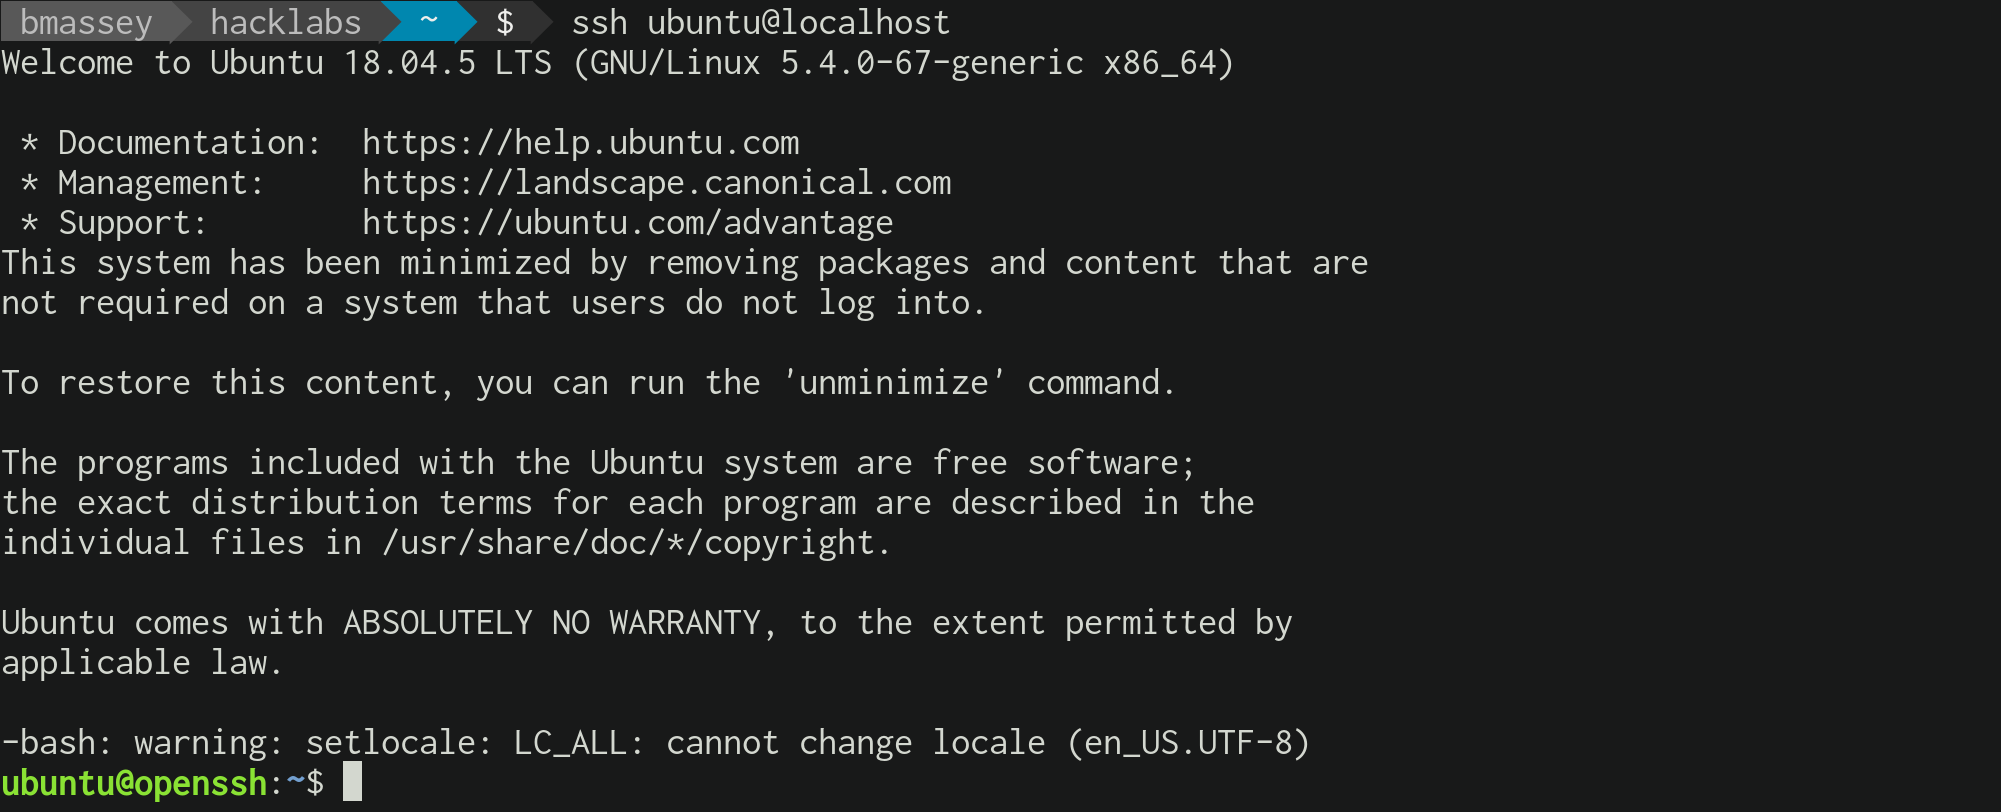
Get a signed openssh certificate for the demo user from vault then connect
to the openssh-server using the certificate.
# Run a Vault CLI container
docker run --rm -it --name vault-cli \
    --entrypoint ash \
    -e VAULT_SKIP_VERIFY=true \
    -e VAULT_ADDR=https://vault.lazybit.ch \
    --network host \
    vault:1.7.0

# Login as the demo user using OIDC
vault login --method=oidc role=default

# Sign your public key (truncated)
vault write -field=signed_key ssh/sign/ssh -<<EOF >> ~/.ssh/id_rsa-cert.pub
{
  "public_key": "ssh-rsa AAAA...",
  "extensions": {
    "permit-pty": "",
    "permit-port-forwarding": ""
  }
}
EOF

# Exit the Vault CLI container
exit
Note:
openssh-serverusesid_rsa-cert.pubby default.
Conclusion
It's beautiful. For a production deployment we can harden the Vault, back the Vault with a PostgreSQL database, configure Keycloak as a relaying party with an IdP, configure Vault to associate roles with users groups, configure different Vault SSH certificate signers for different hosts or collection of hosts, etc.