Harbor Keycloak Auth
Harbors easy OIDC authentication configuration.
Loving Harbor as much as I am? Looking for a way to secure your Harbor installation? In this blog post we'll deploy Keycloak and configure it as the authentication provider for Harbor.
Pre-requisites
You'll need a publicly accessible Kubernetes cluster and TLS certificates to secure the ingresses.
I'm deploying with helm against a public GKE cluster with cert-manager installed and configured for issuing ACME production certificates.
Installation
Configure the helm repos for Keycloak and Harbor:
helm repo add codecentric https://codecentric.github.io/helm-charts
helm repo add harbor https://helm.goharbor.io
Create the Kubernetes namespaces then install the charts:
kubectl create namespace keycloak
helm upgrade --install --namespace keycloak keycloak \
    --set keycloak.ingress.enabled=true \
    --set keycloak.ingress.annotations."kubernetes\.io/ingress\.class"=nginx \
    --set keycloak.ingress.hosts[0]="keycloak.example.com" \
    --set keycloak.ingress.tls[0].hosts[0]="keycloak.example.com" \
    --set keycloak.ingress.tls[0].secretName=example-com-tls \
    --set keycloak.persistence.dbVendor=postgres \
    --set keycloak.persistence.deployPostgres=true \
    --set postgresql.postgresqlUser=keycloak \
    --set postgresql.postgresqlDatabase=keycloak \
    --set postgresql.persistence.enabled=true \
    --set postgresql.replication.enabled=true \
    --set postgresql.replication.slaveReplicas=2 \
    --set postgresql.replication.synchronousCommit="on" \
    --set postgresql.replication.numSynchronousReplicas=1 \
    --set postgresql.metrics.enabled=true \
    codecentric/keycloak

kubectl create namespace harbor
helm upgrade --install --namespace harbor harbor \
    --set expose.type=ingress \
    --set expose.tls.enabled=true \
    --set expose.tls.secretName=example-com-tls \
    --set expose.ingress.hosts.core=harbor.example.com \
    --set expose.ingress.hosts.notary=notary.example.com \
    --set expose.ingress.annotations."kubernetes\.io/ingress\.class"=nginx \
    --set persistence.enabled=true \
    --set externalURL=https://harbor.example.com \
    --set logLevel=info \
    harbor/harbor
Tip: wait for the Keycloak pods using
kubectl wait --for=condition=Ready pod/keycloak-0 -n keycloak.
Configuration
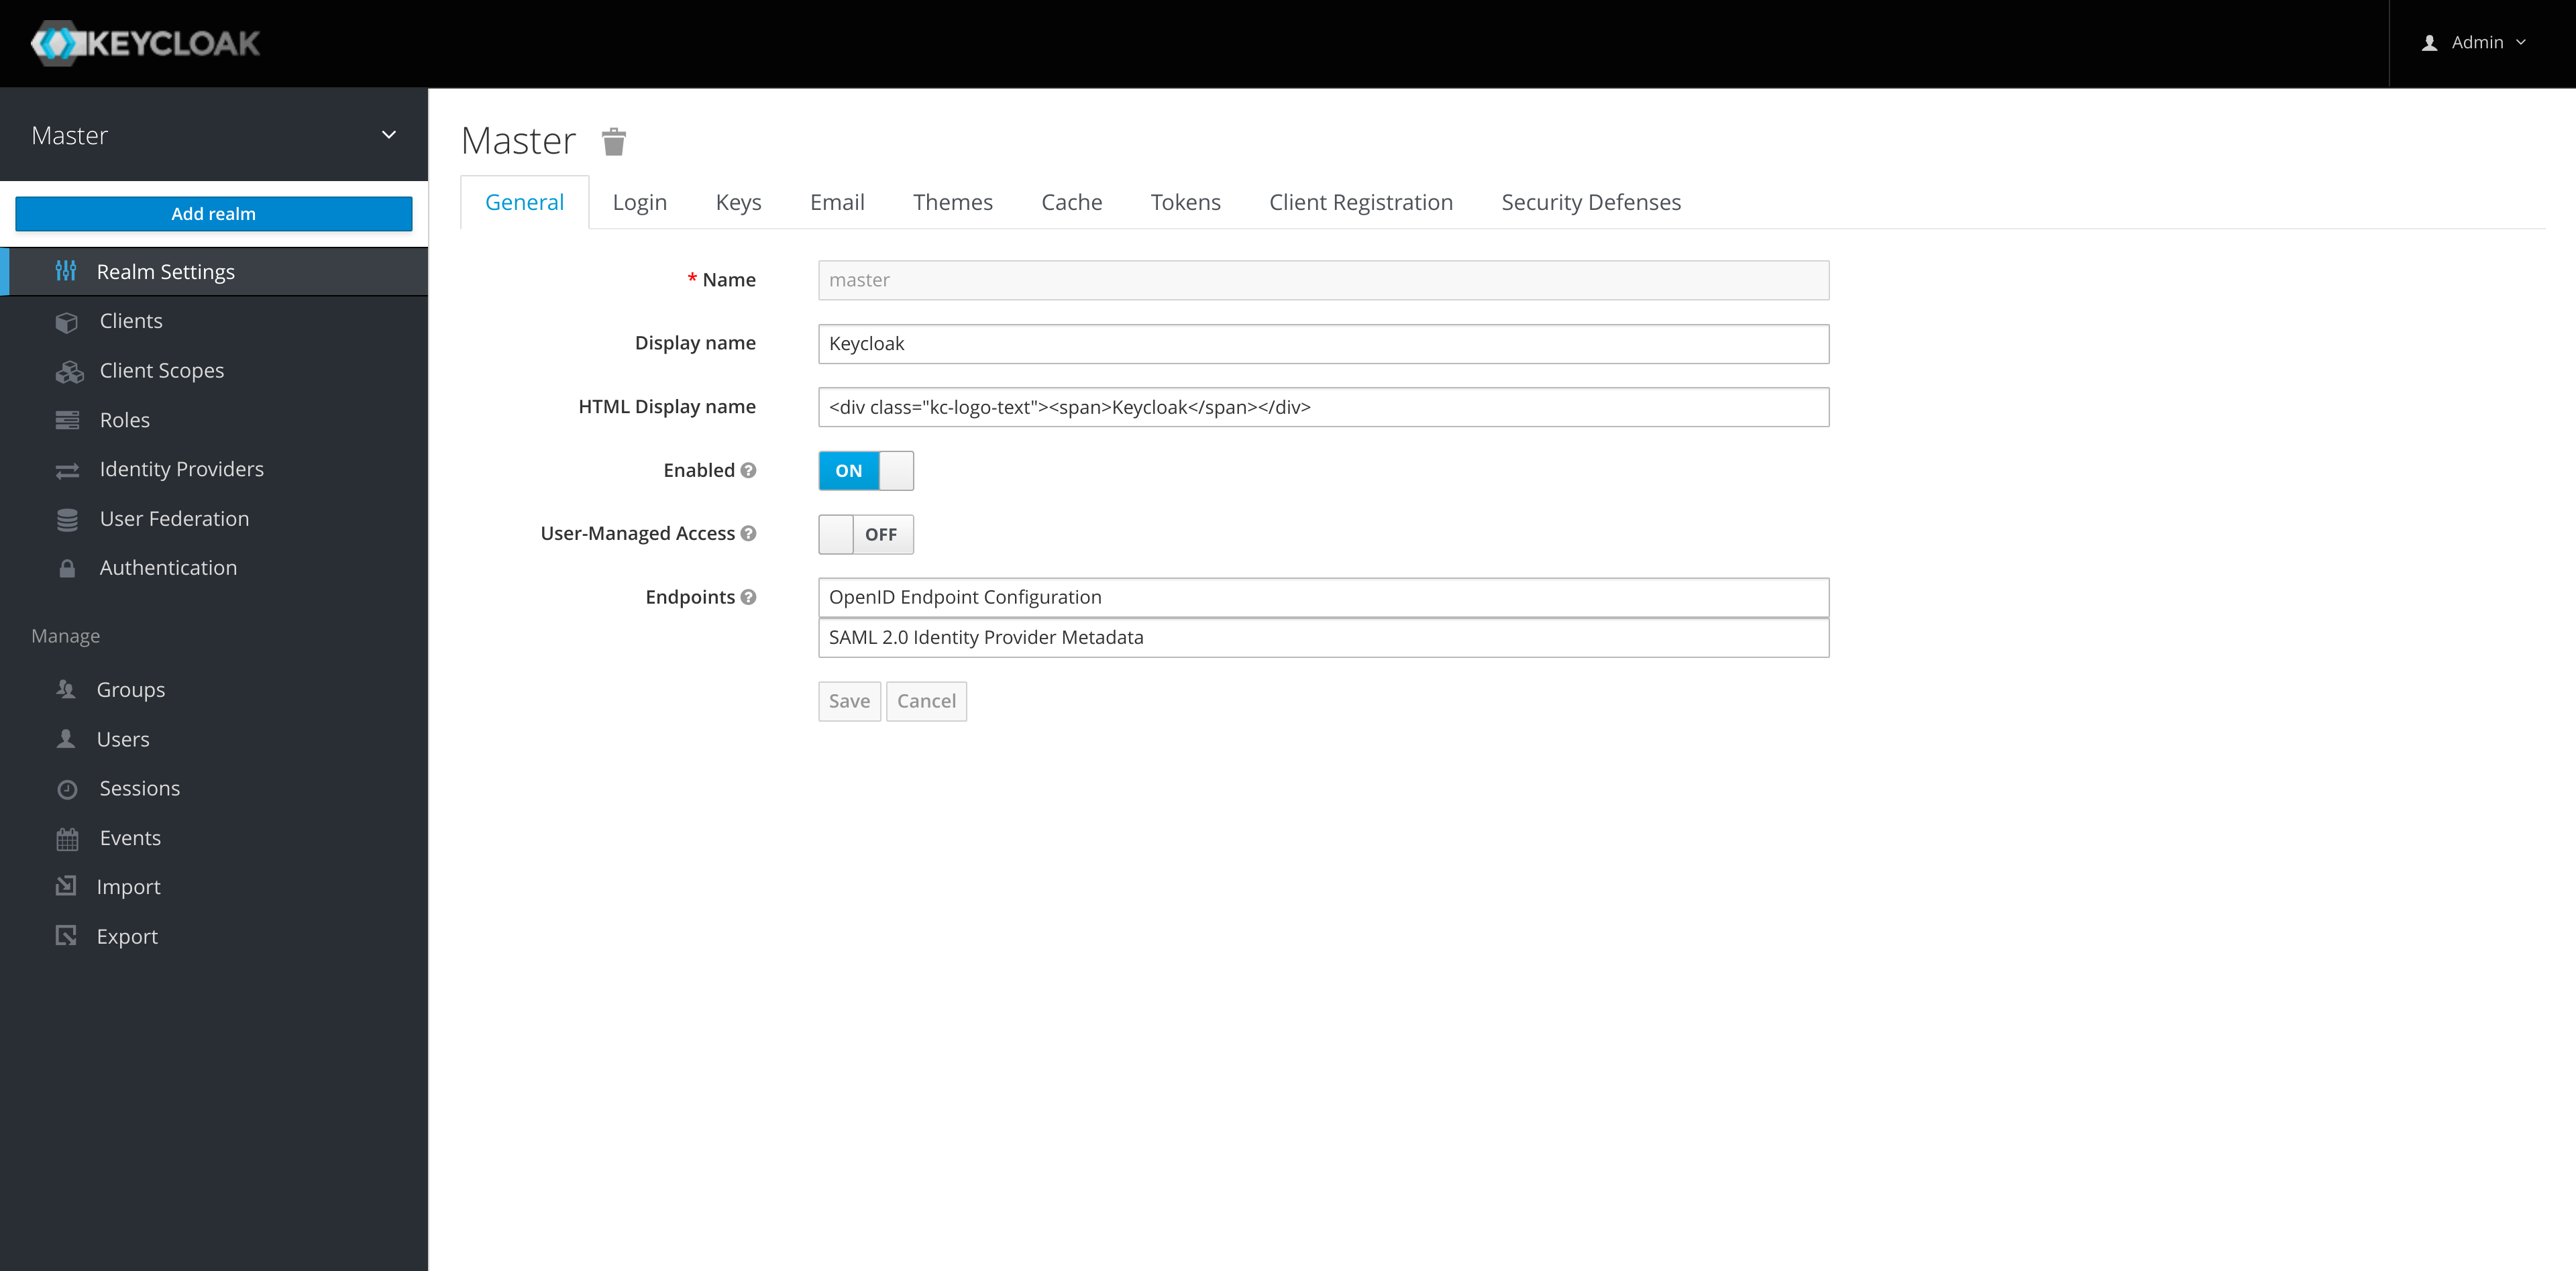
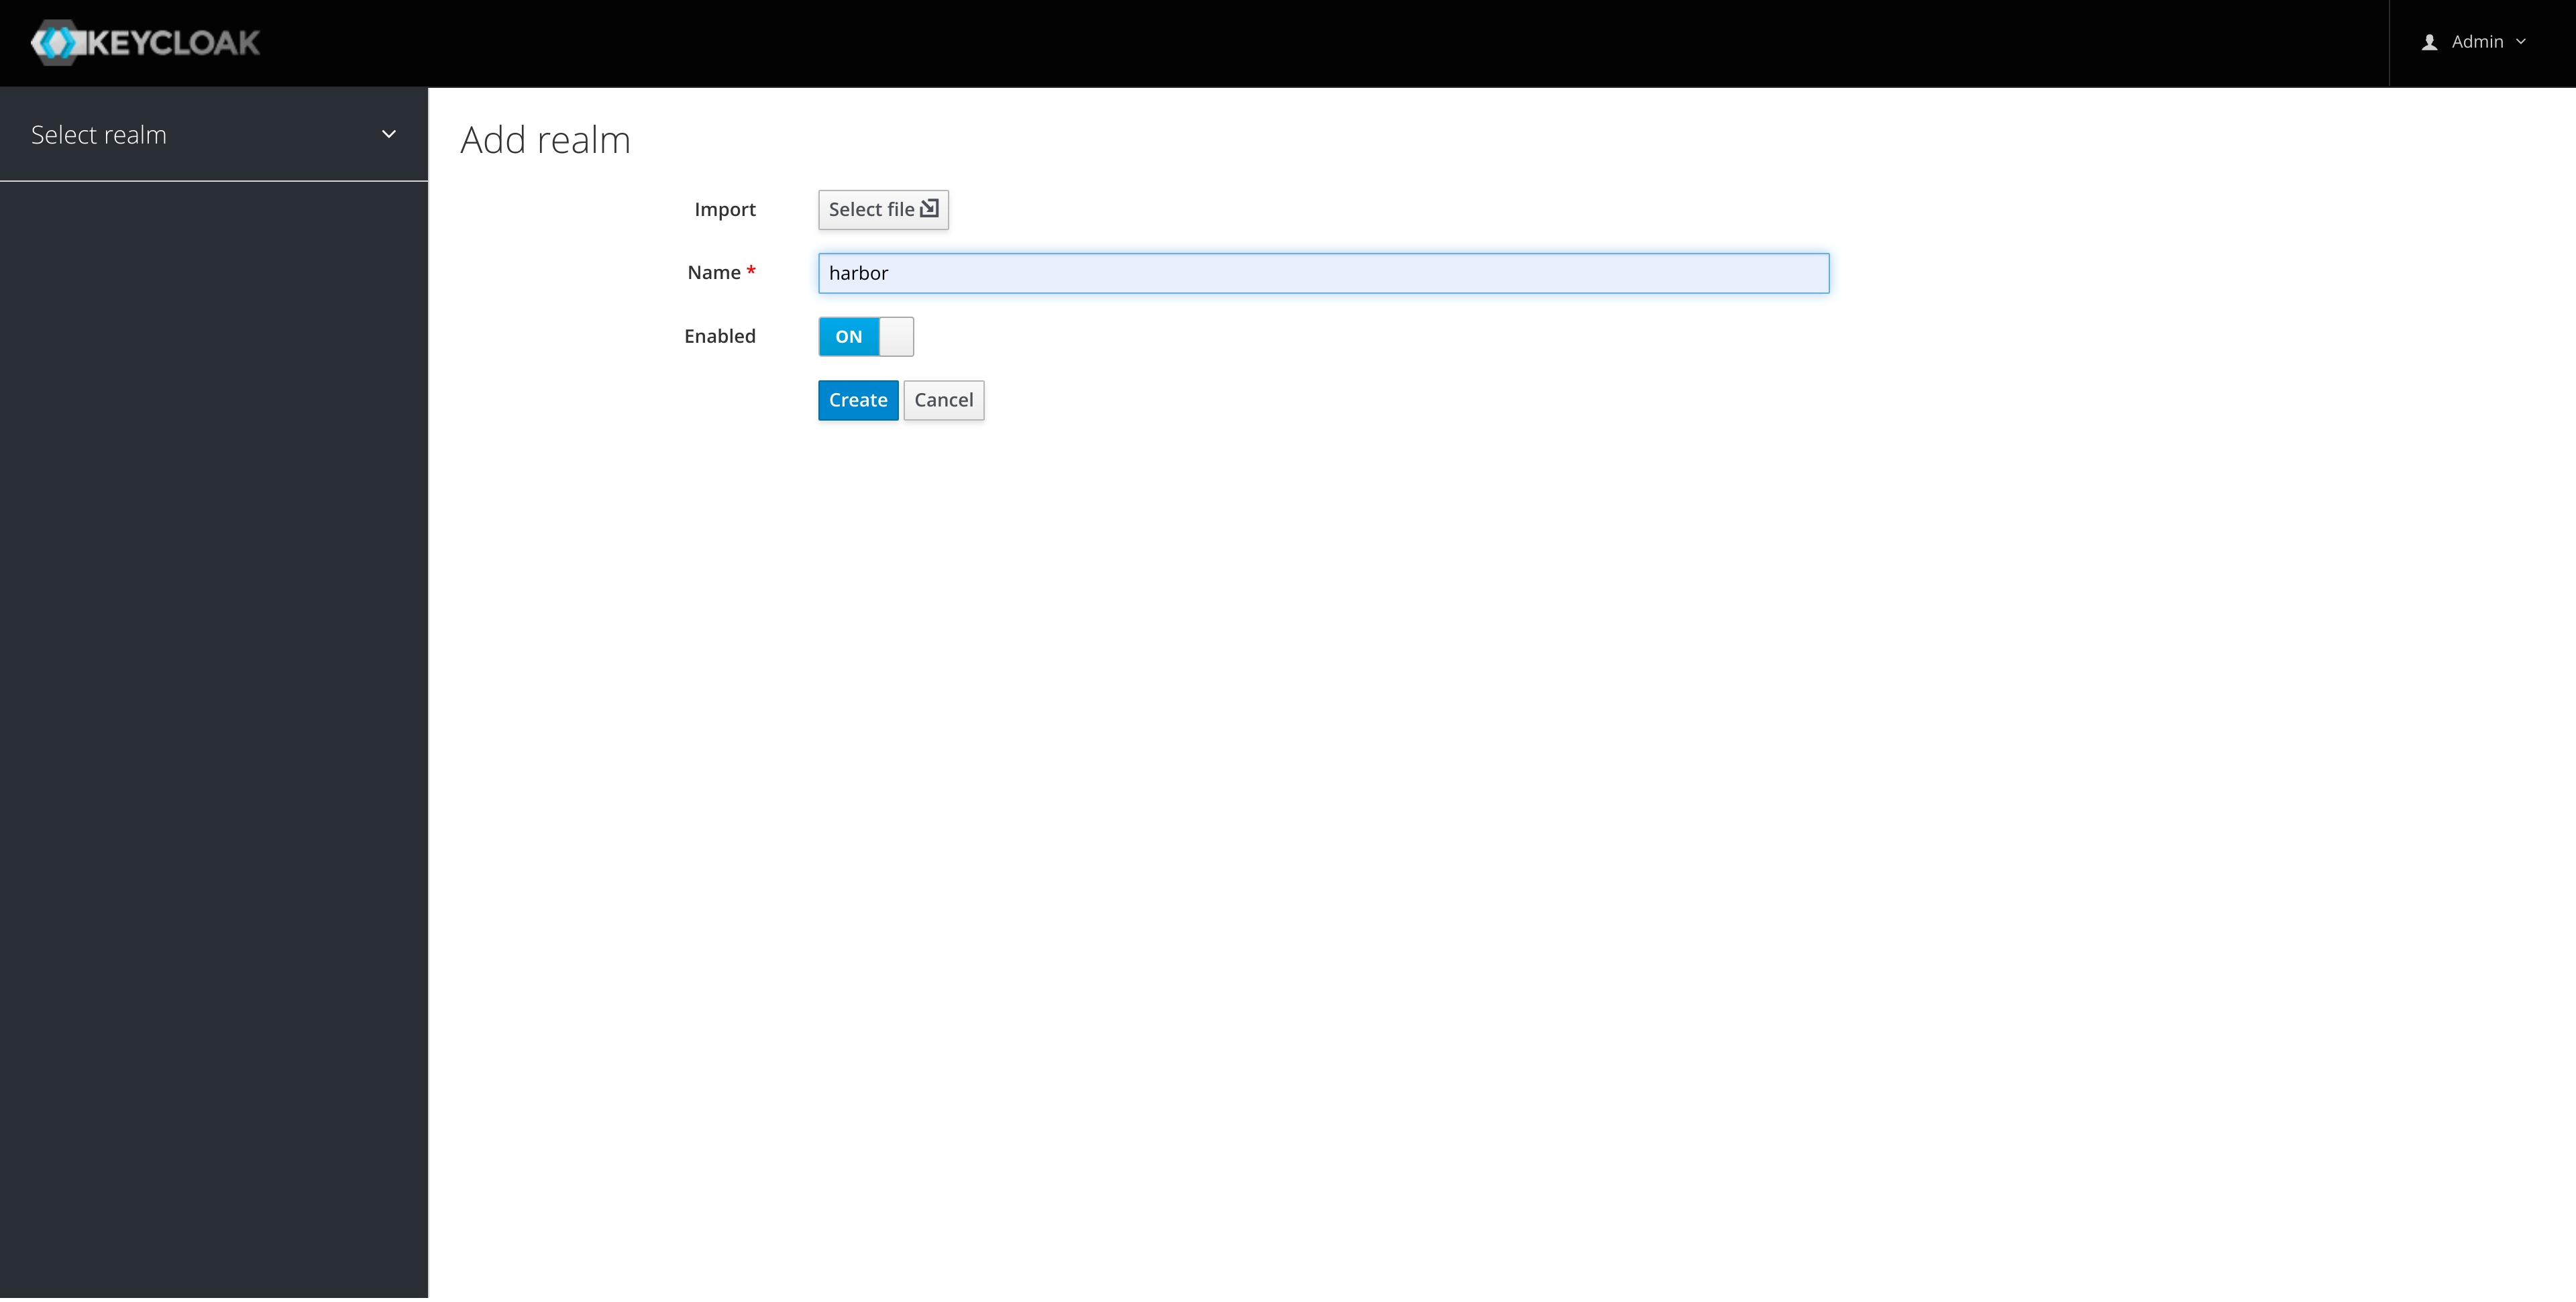
Keycloak needs to be setup first, login to the Keycloak instance and create a new realm for Harbor.
-
Keycloak does not recommend using the initial master realm for an organizations applications so we'll add a new realm in Keycloak for Harbor:
-
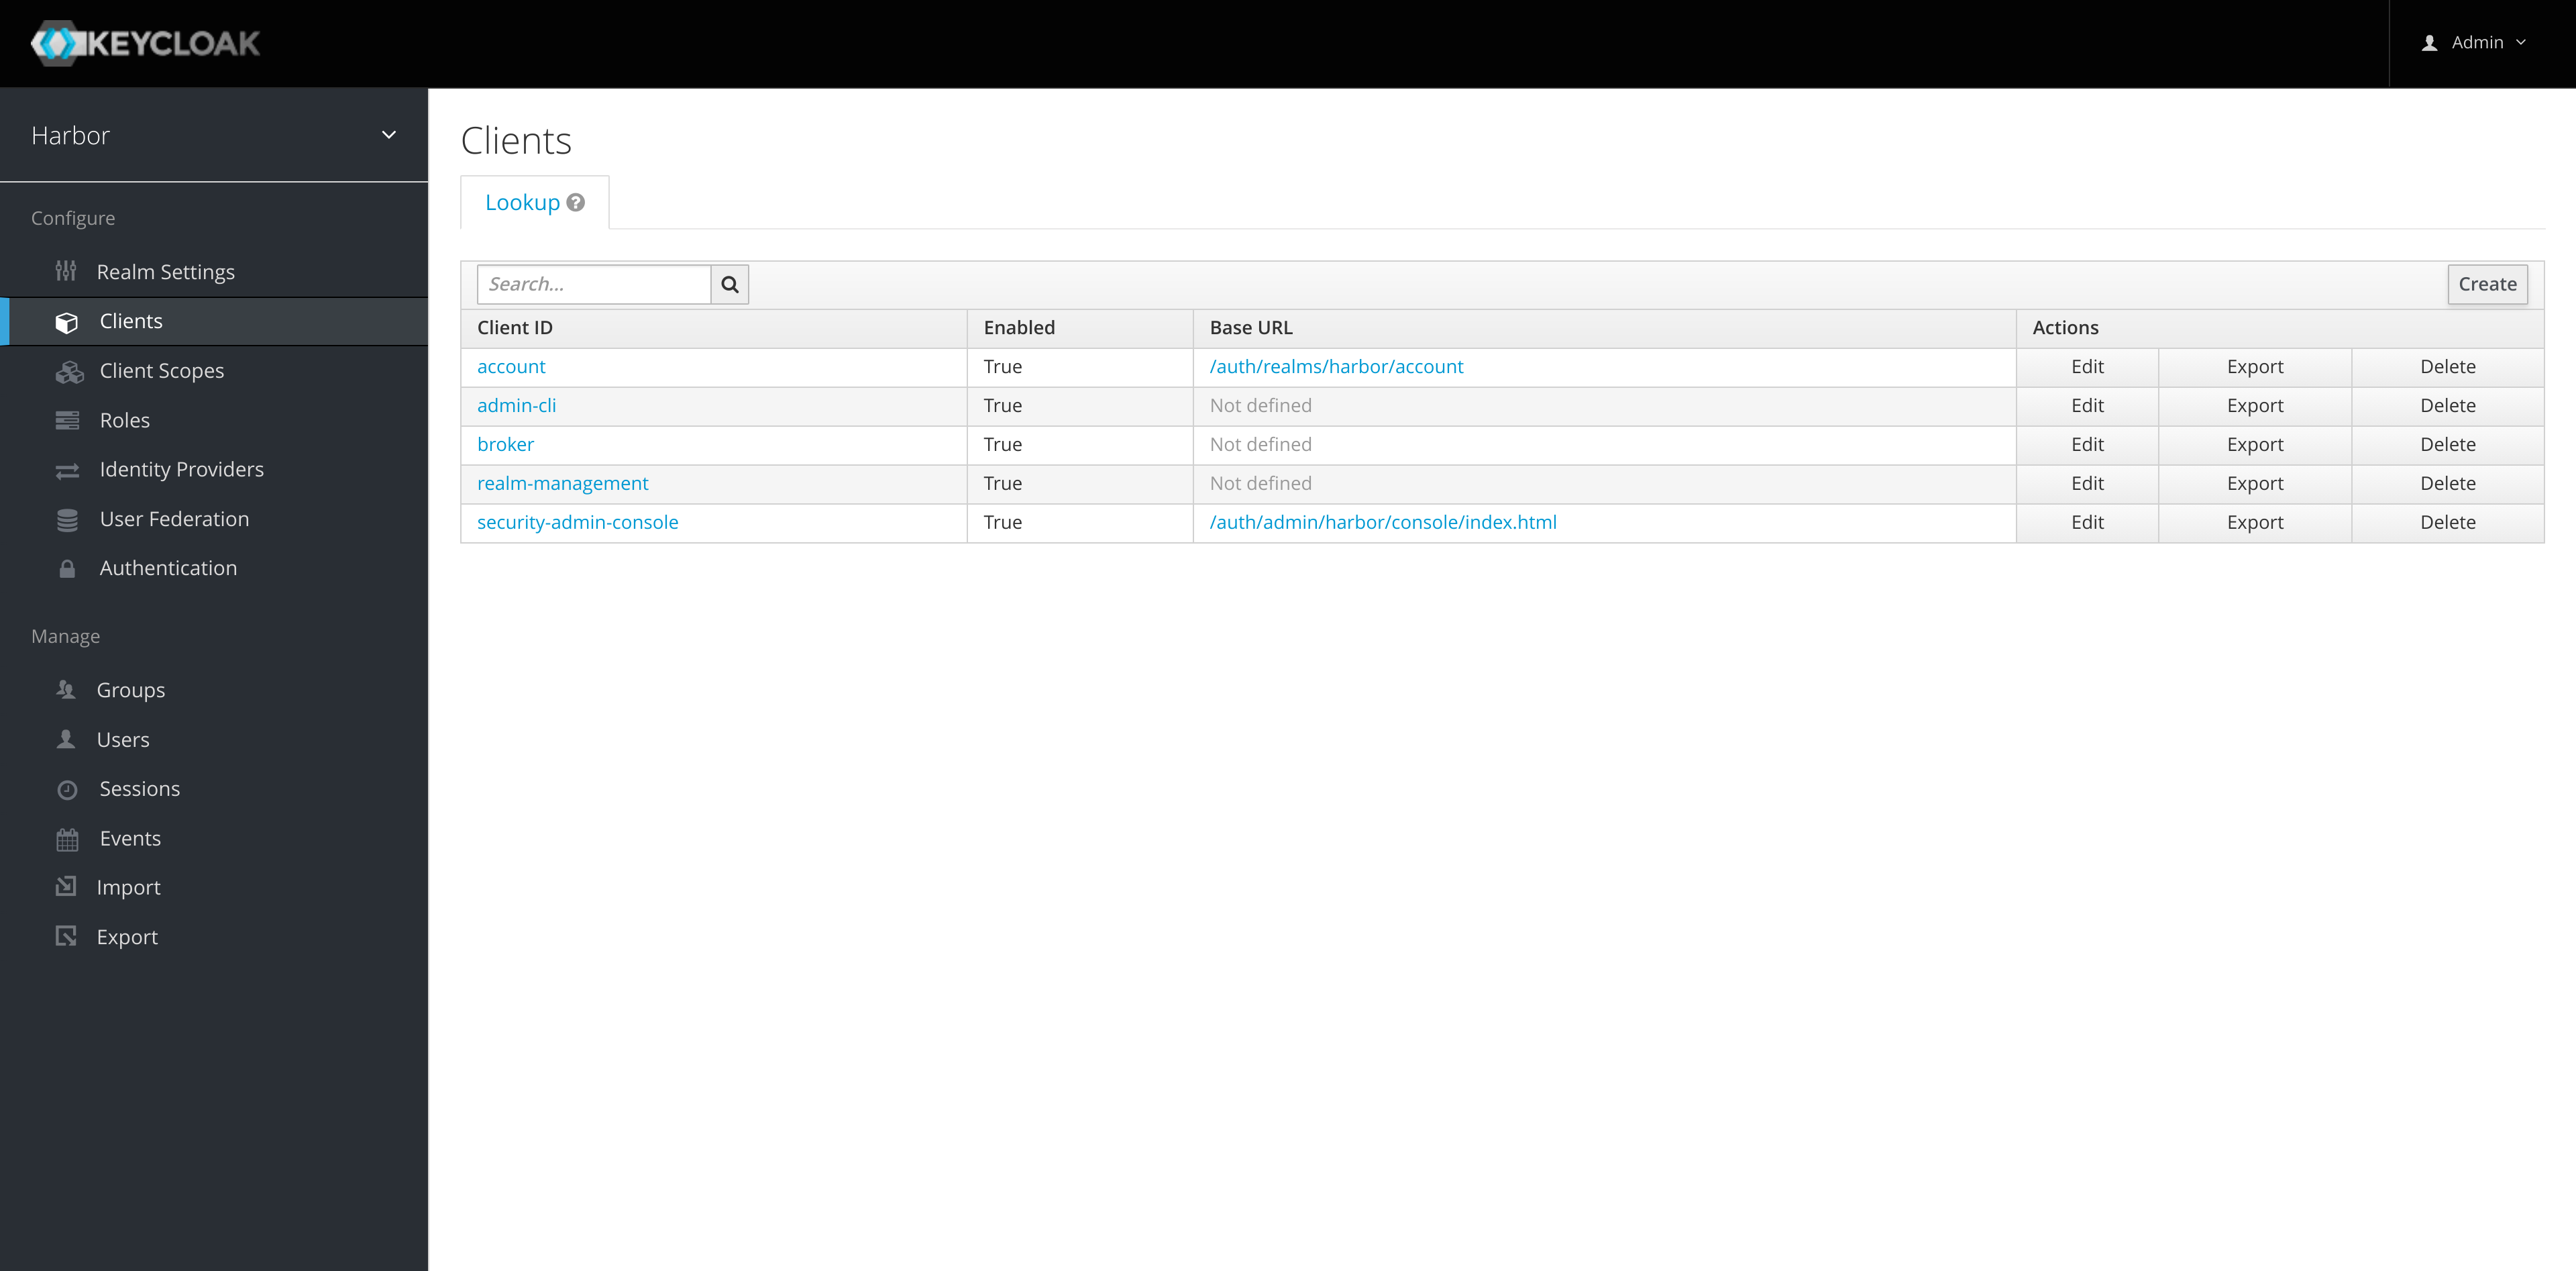
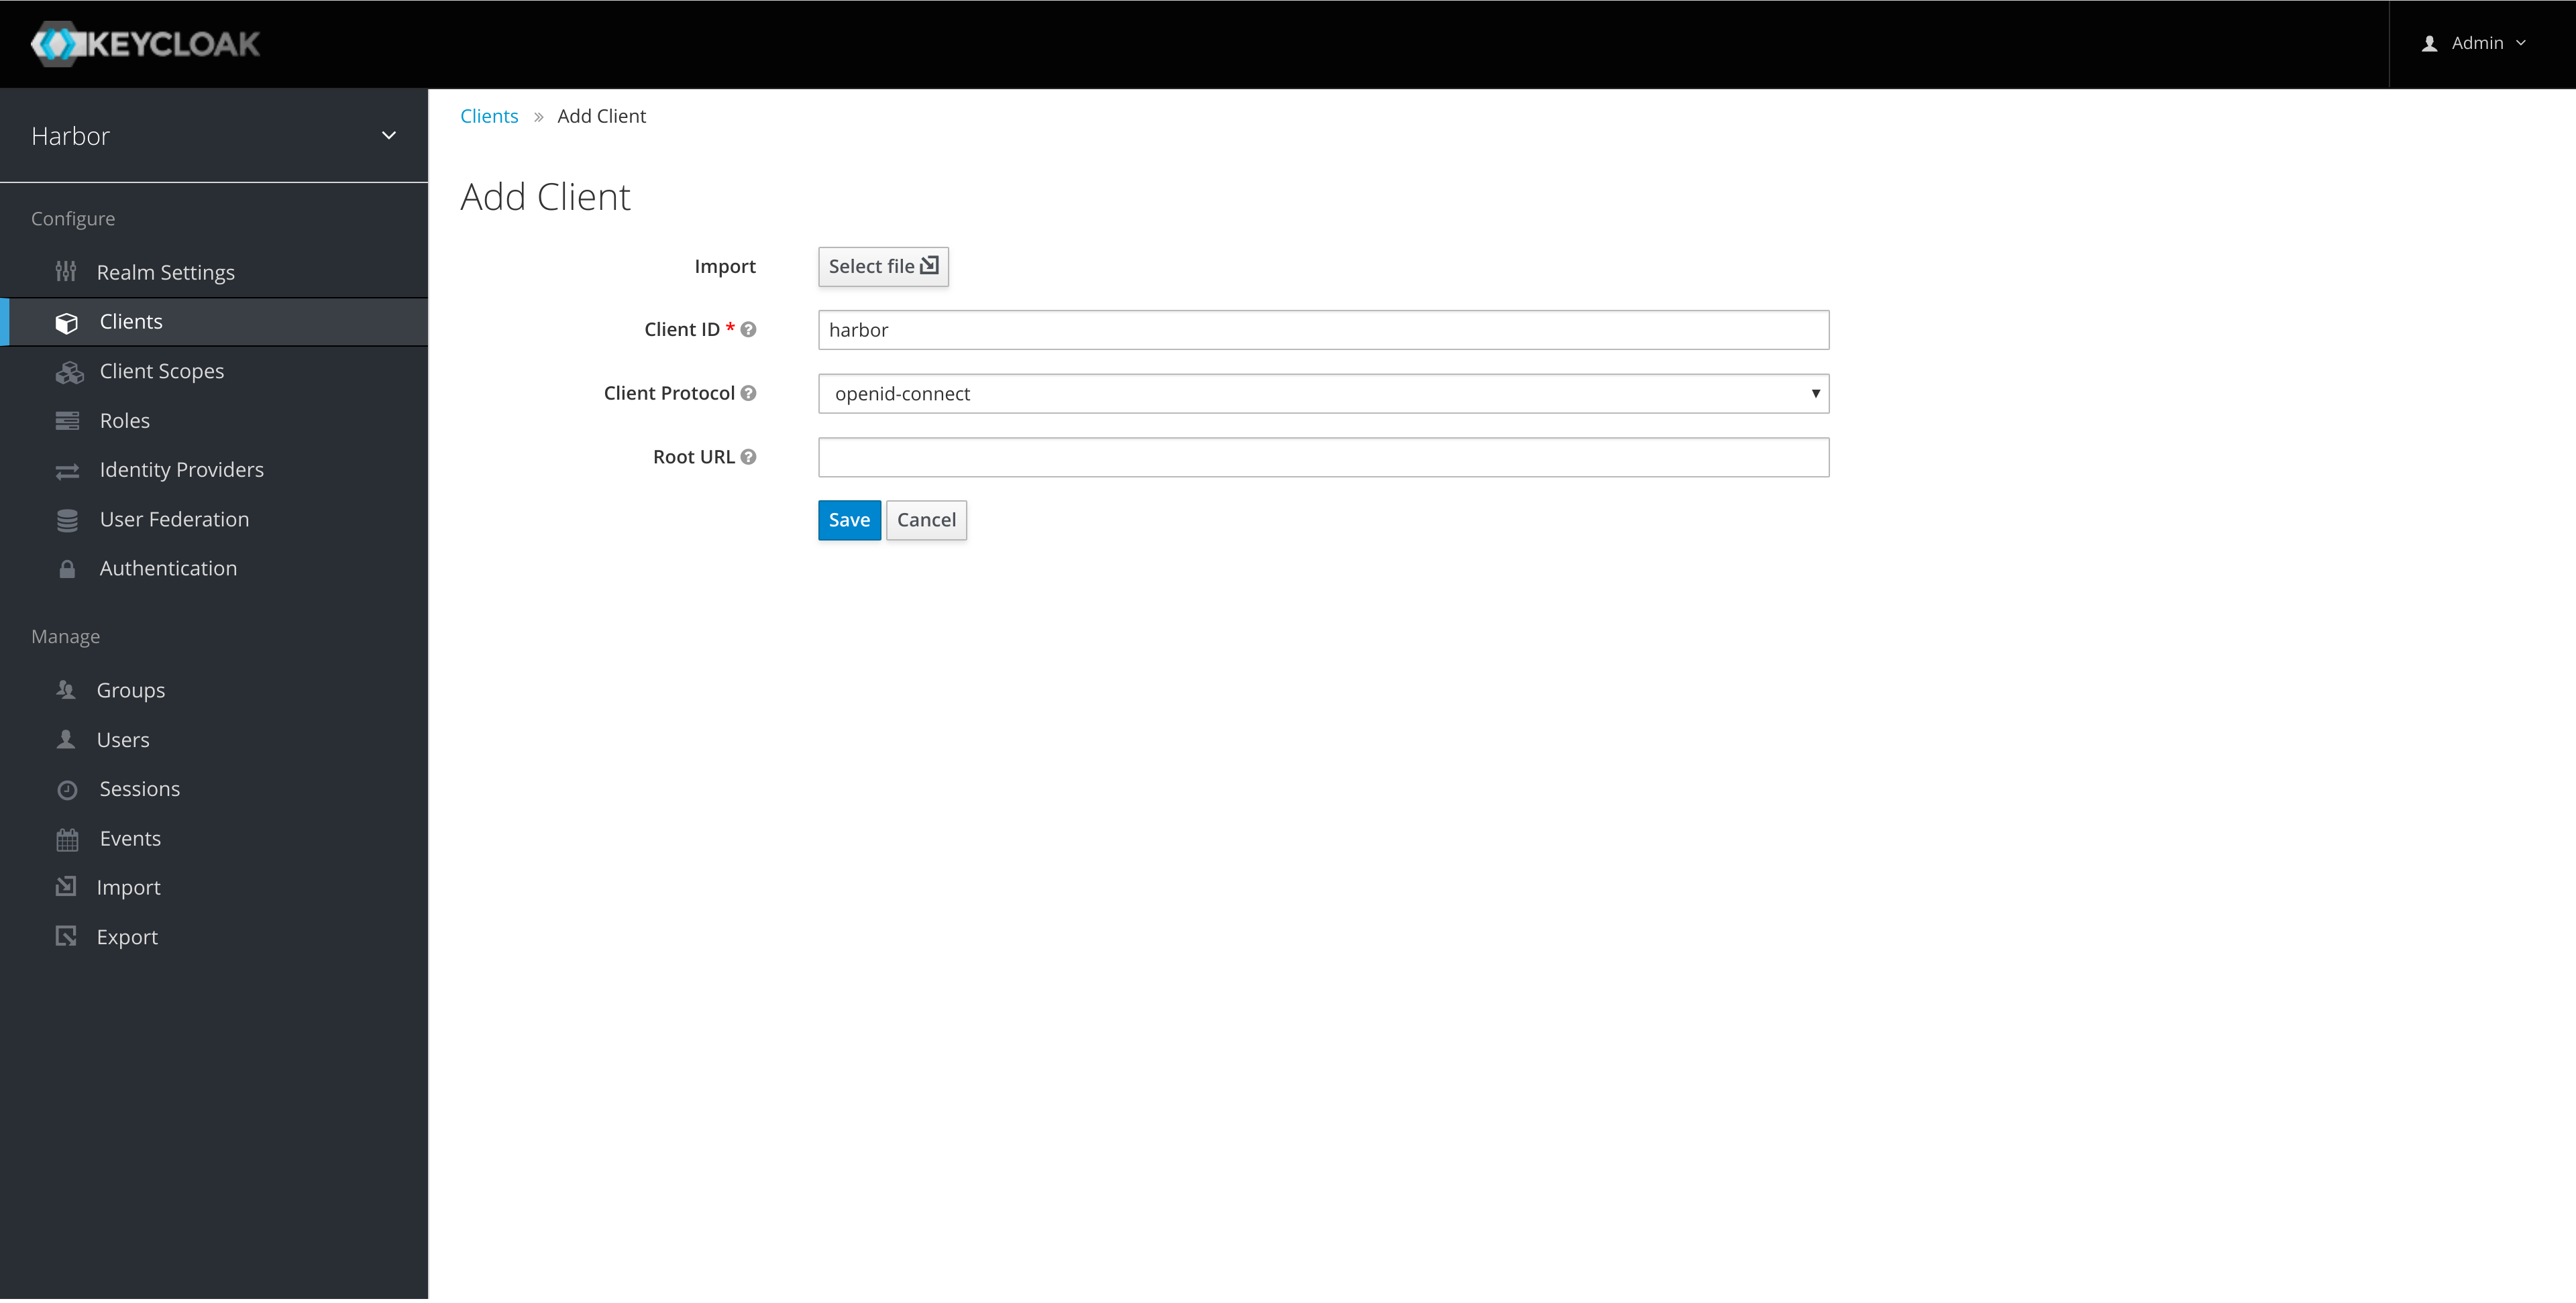
Create a harbor client in the new realm:
-
Enable authorization on the client:
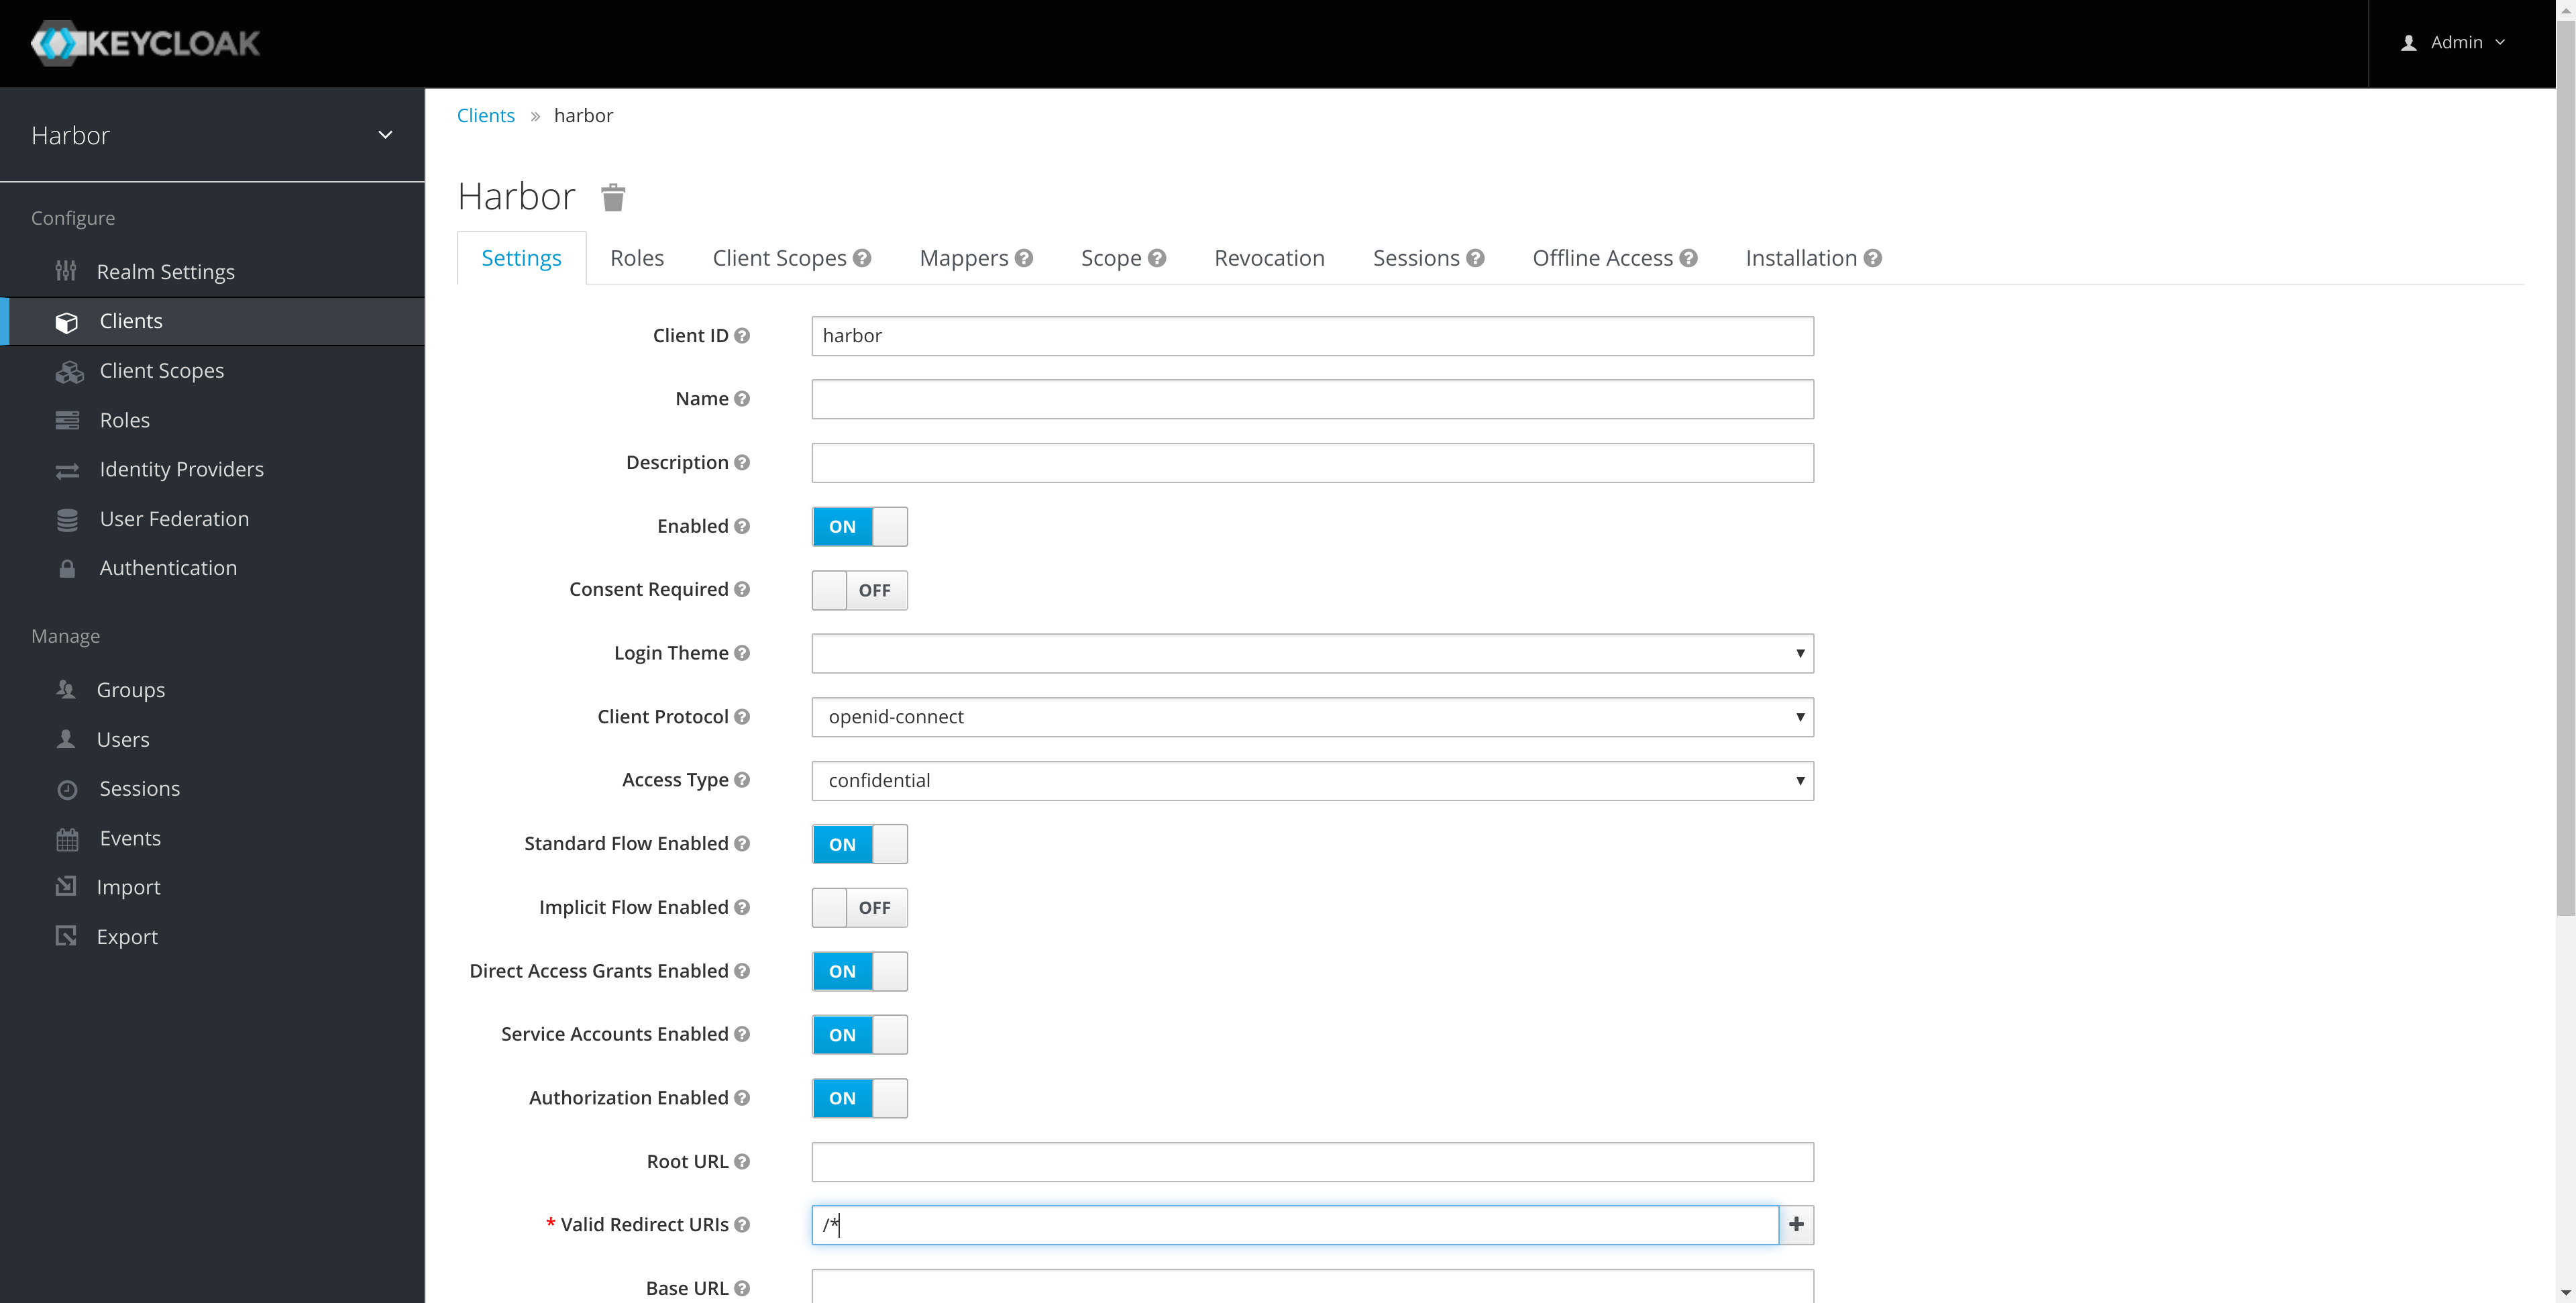
Note: the redirect URI is for example purposes and should be updated for your installation.
-
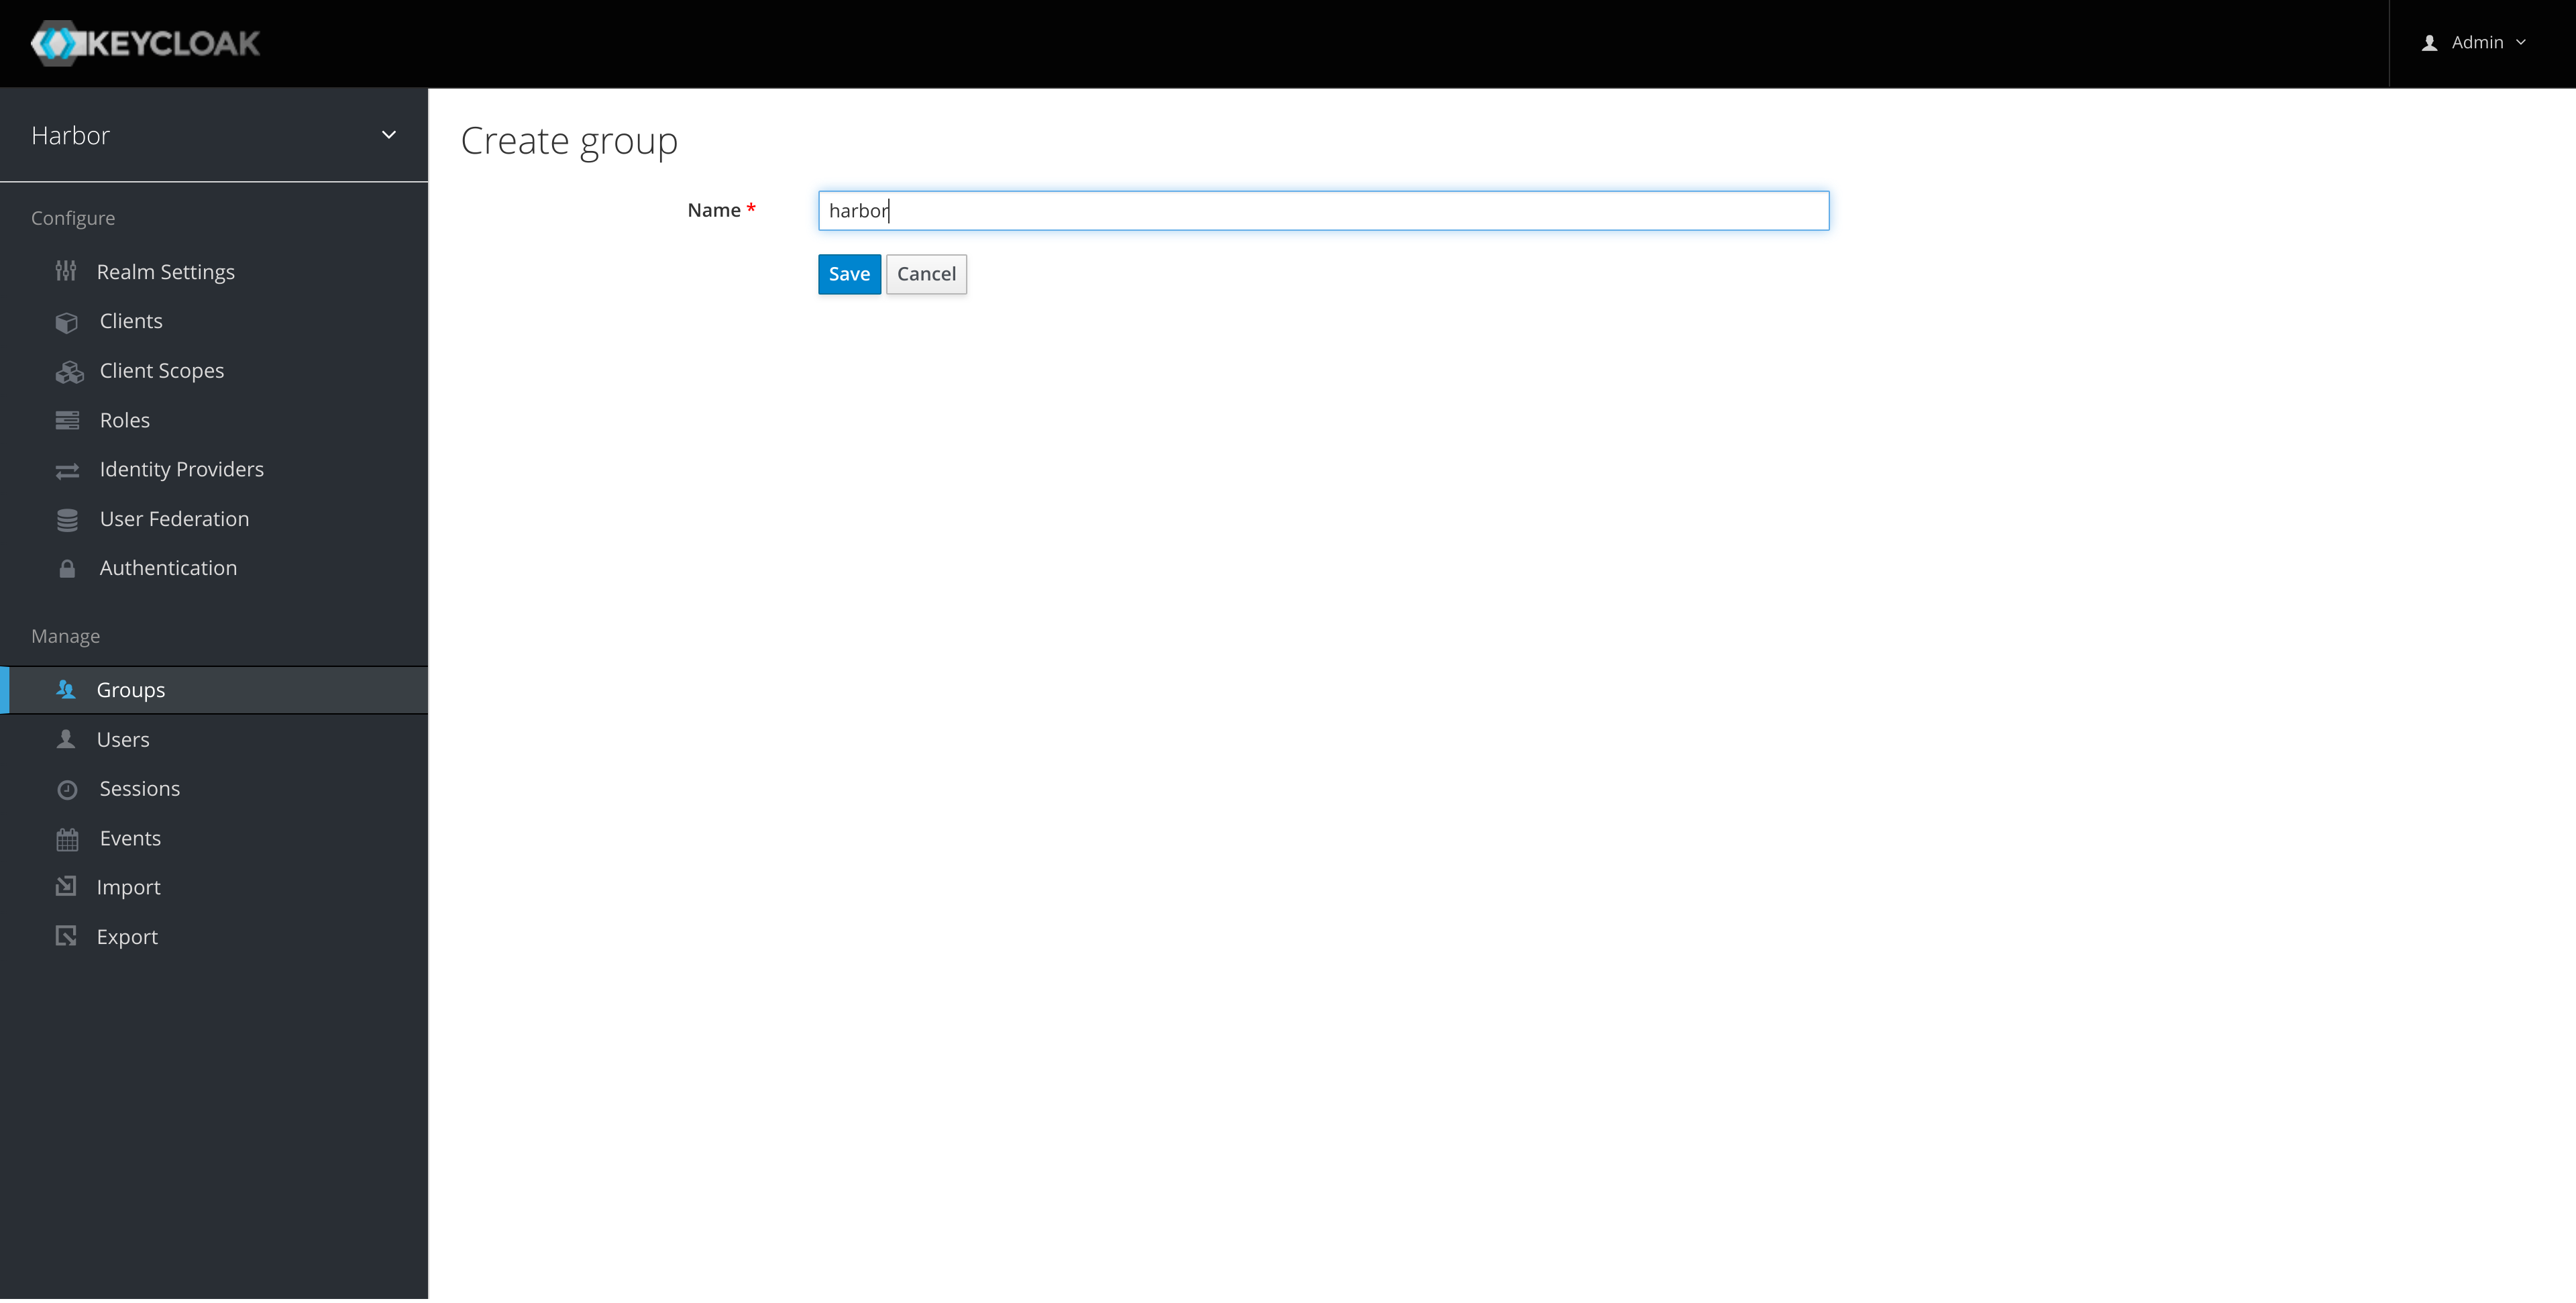
Create a group in keycloak that will be used to grant permissions in Harbor:
-
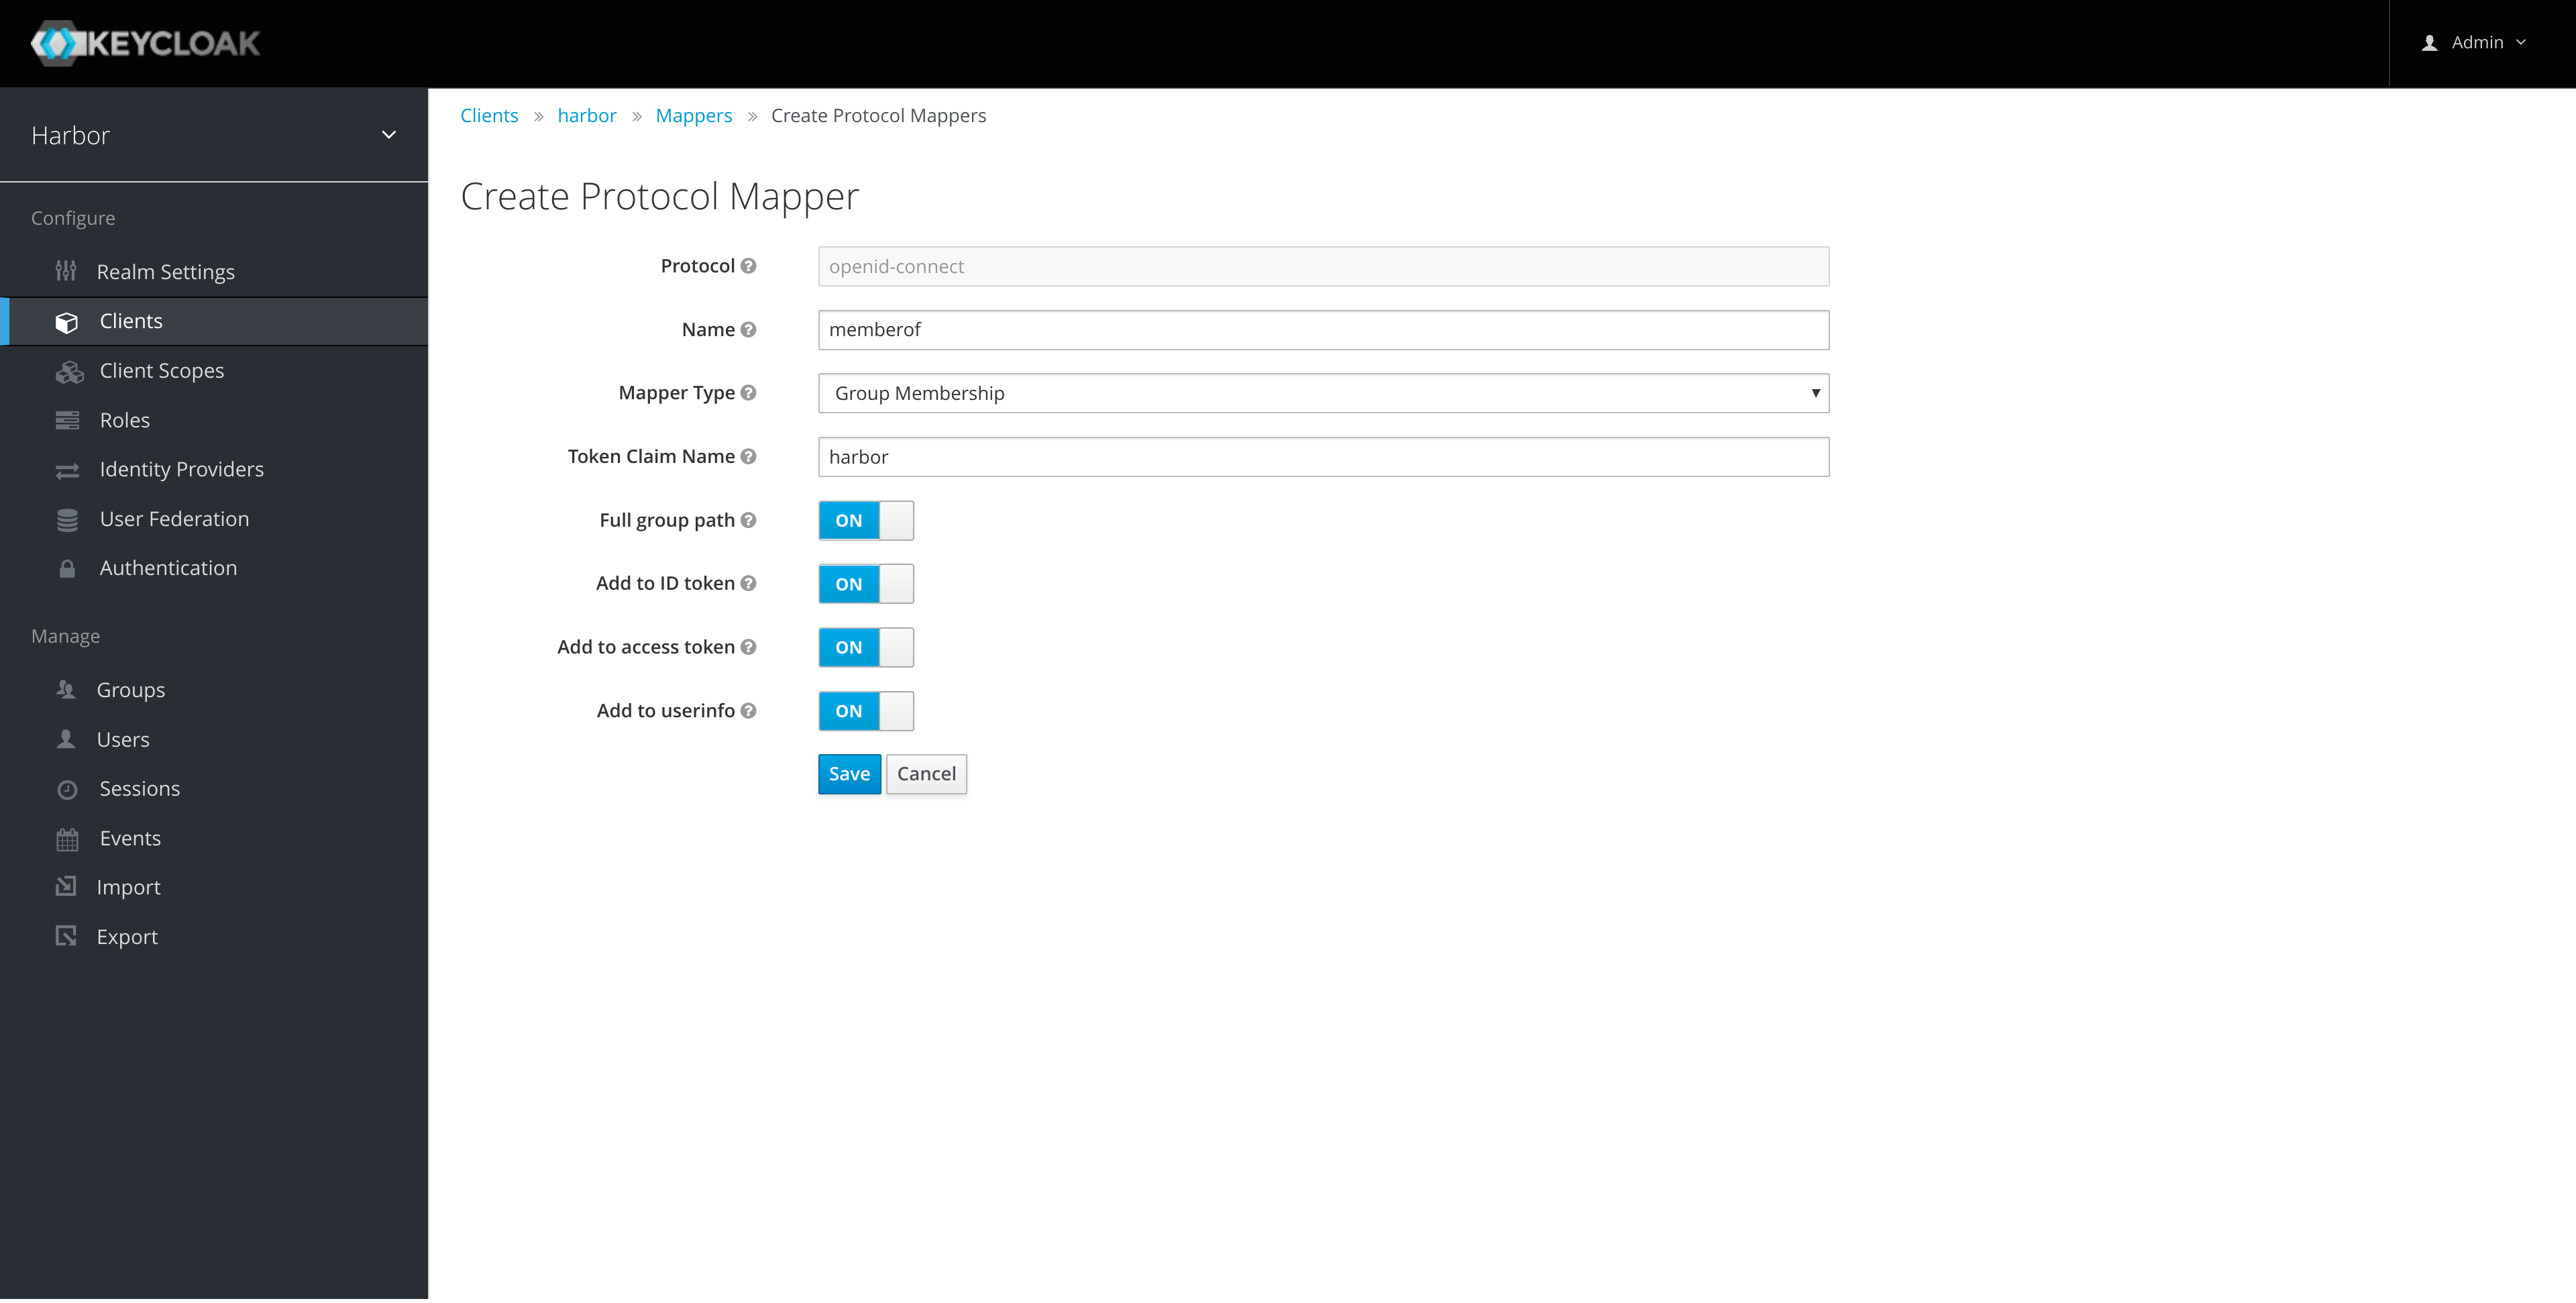
Create a memberof Group Membership Mapper for the harbor client:
-
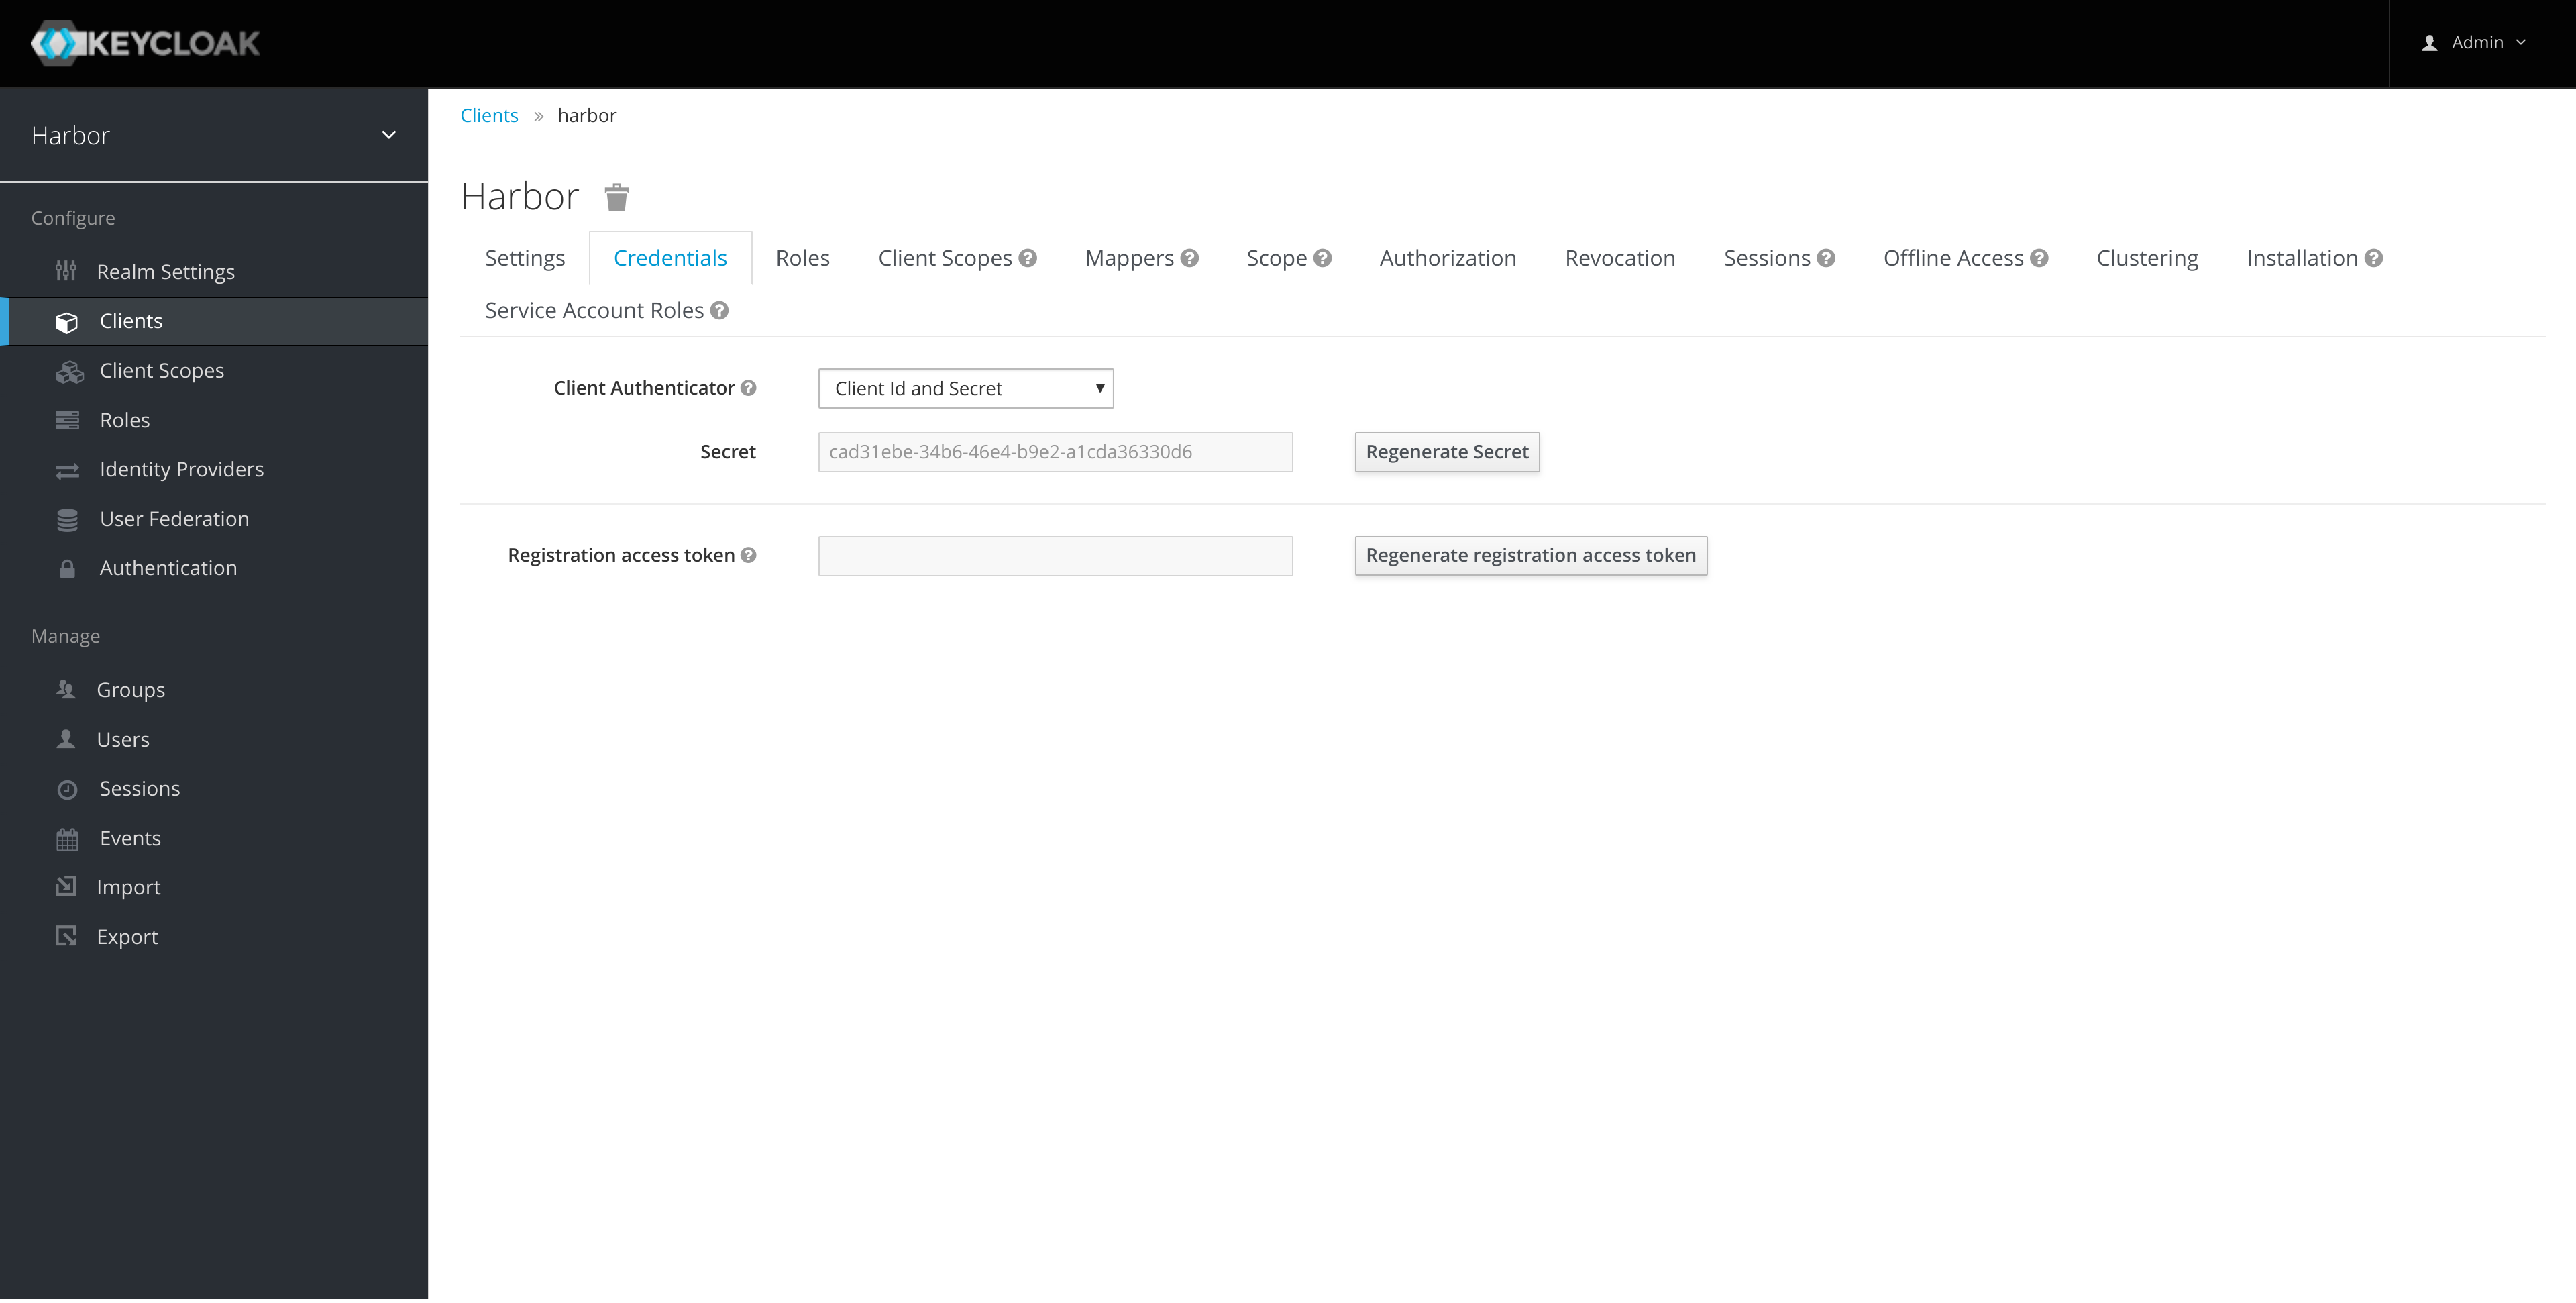
Take a copy of the client secret that we'll need later for configuring Harbor:
-
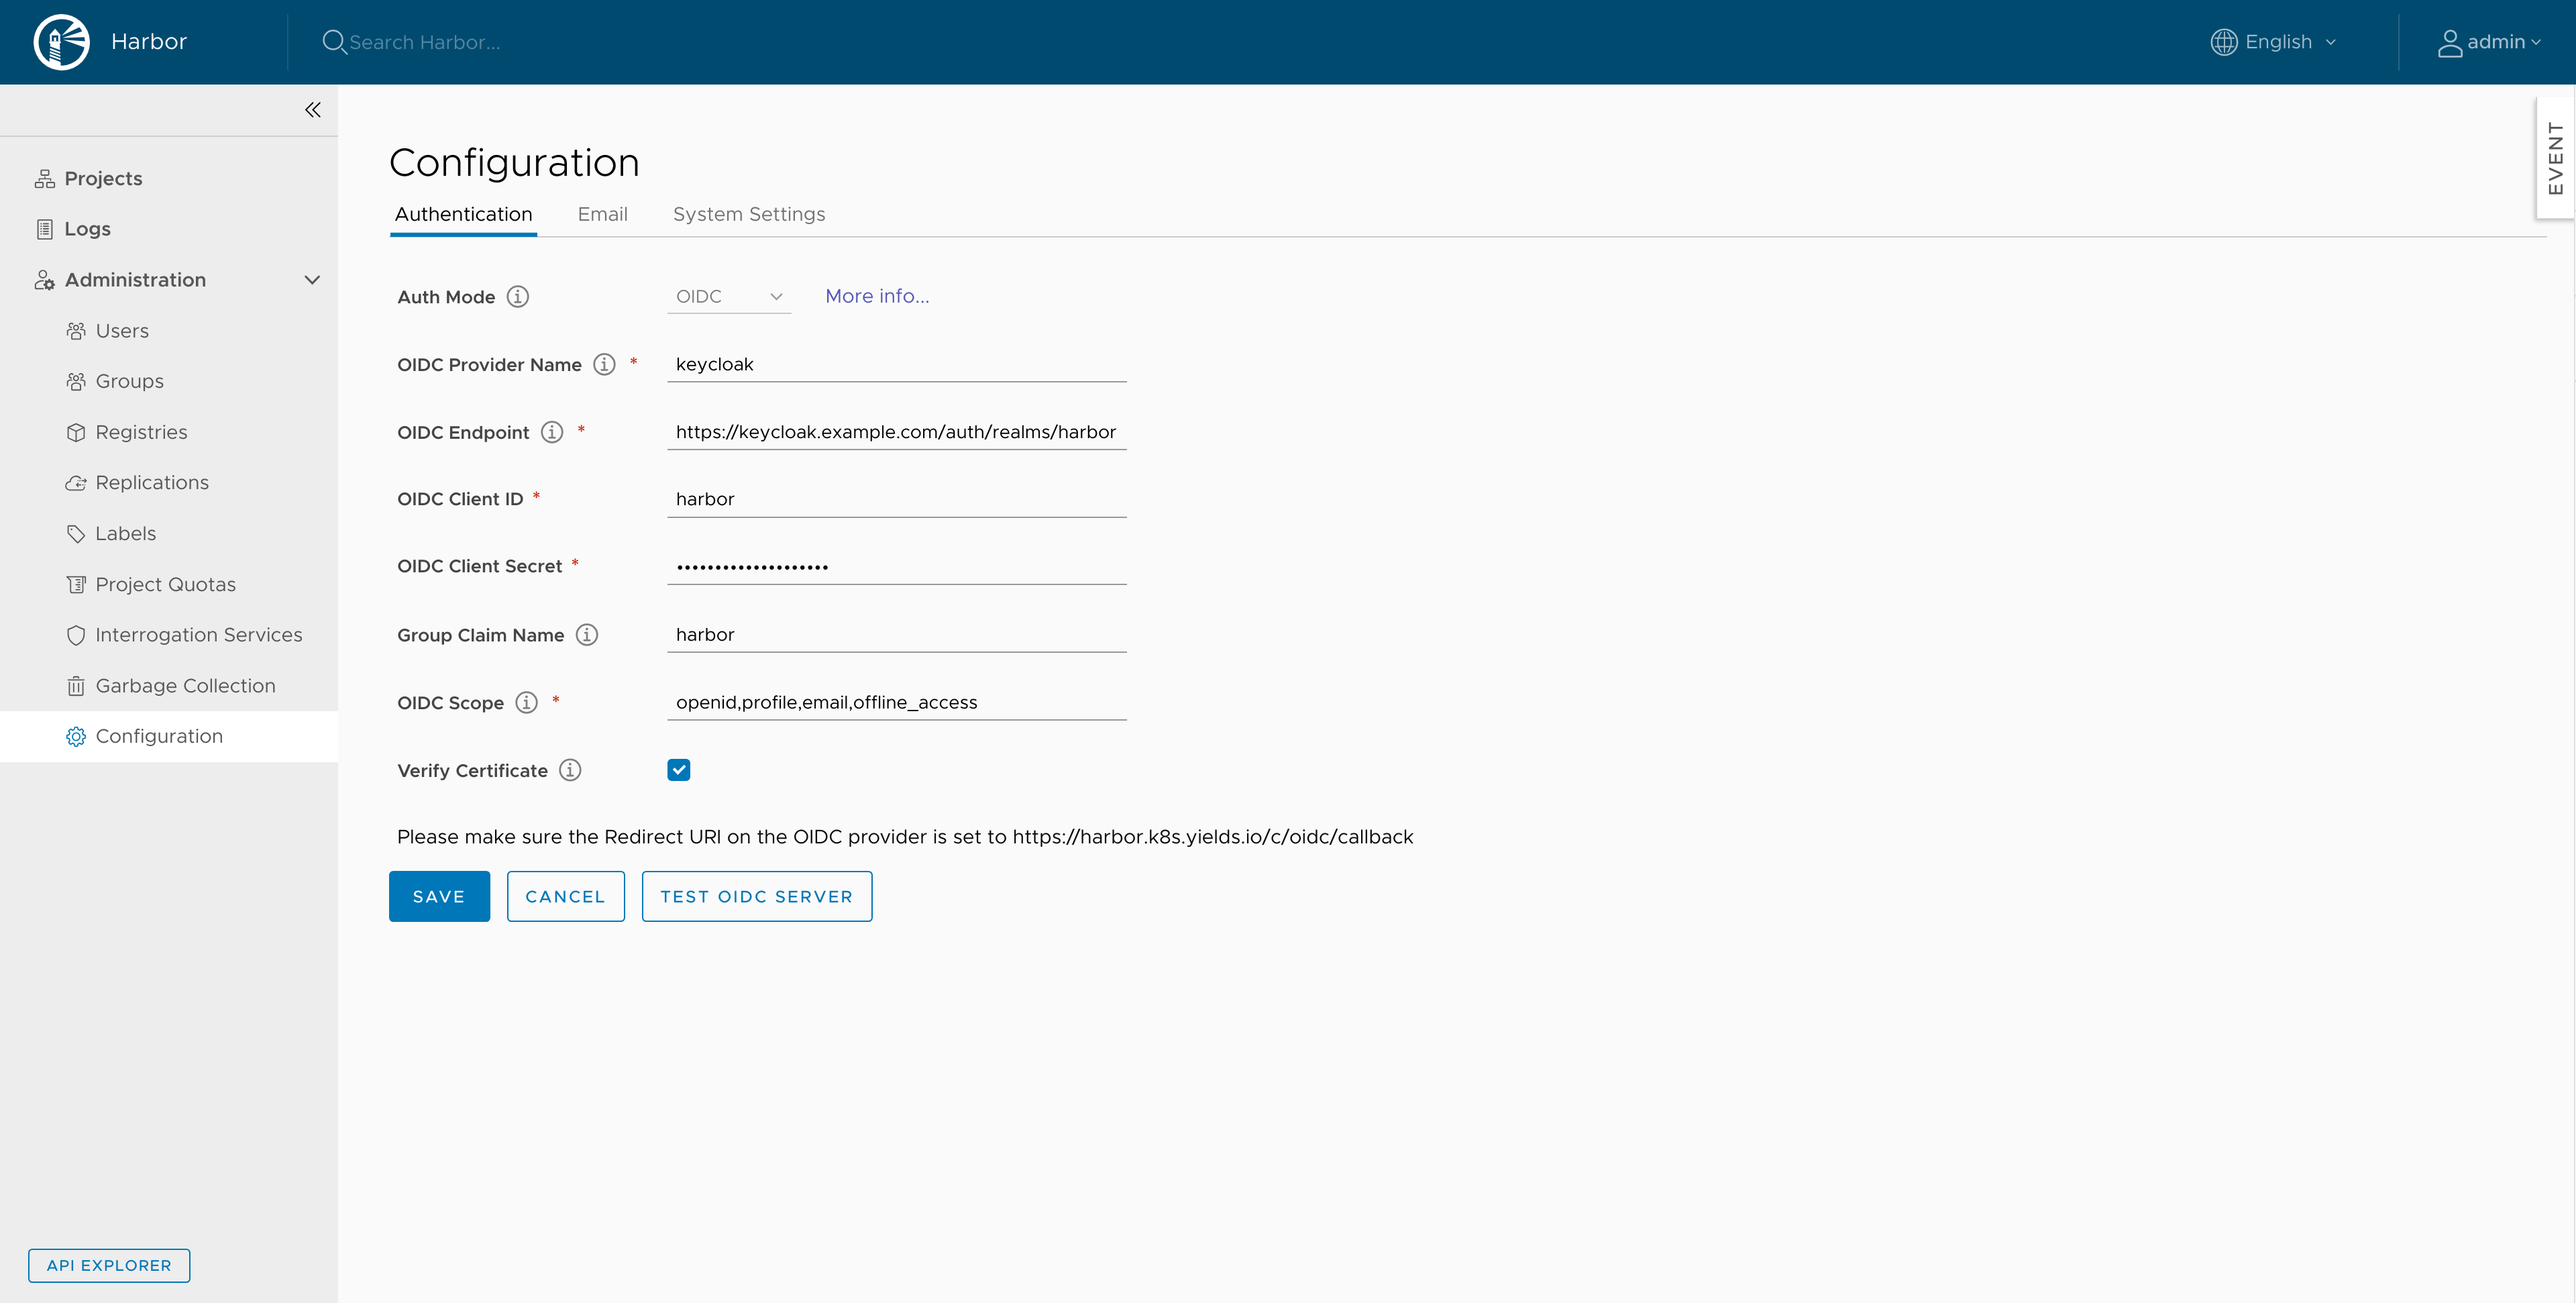
Configure Harbor with the Keycloak instance from the Configuration page (super simple!):
Testing
We'll test with a Keycloak system user however for production I'd suggest configuring the Harbor Keycloak client with an Identity Provider.
-
Create an ops user in keycloak:

-
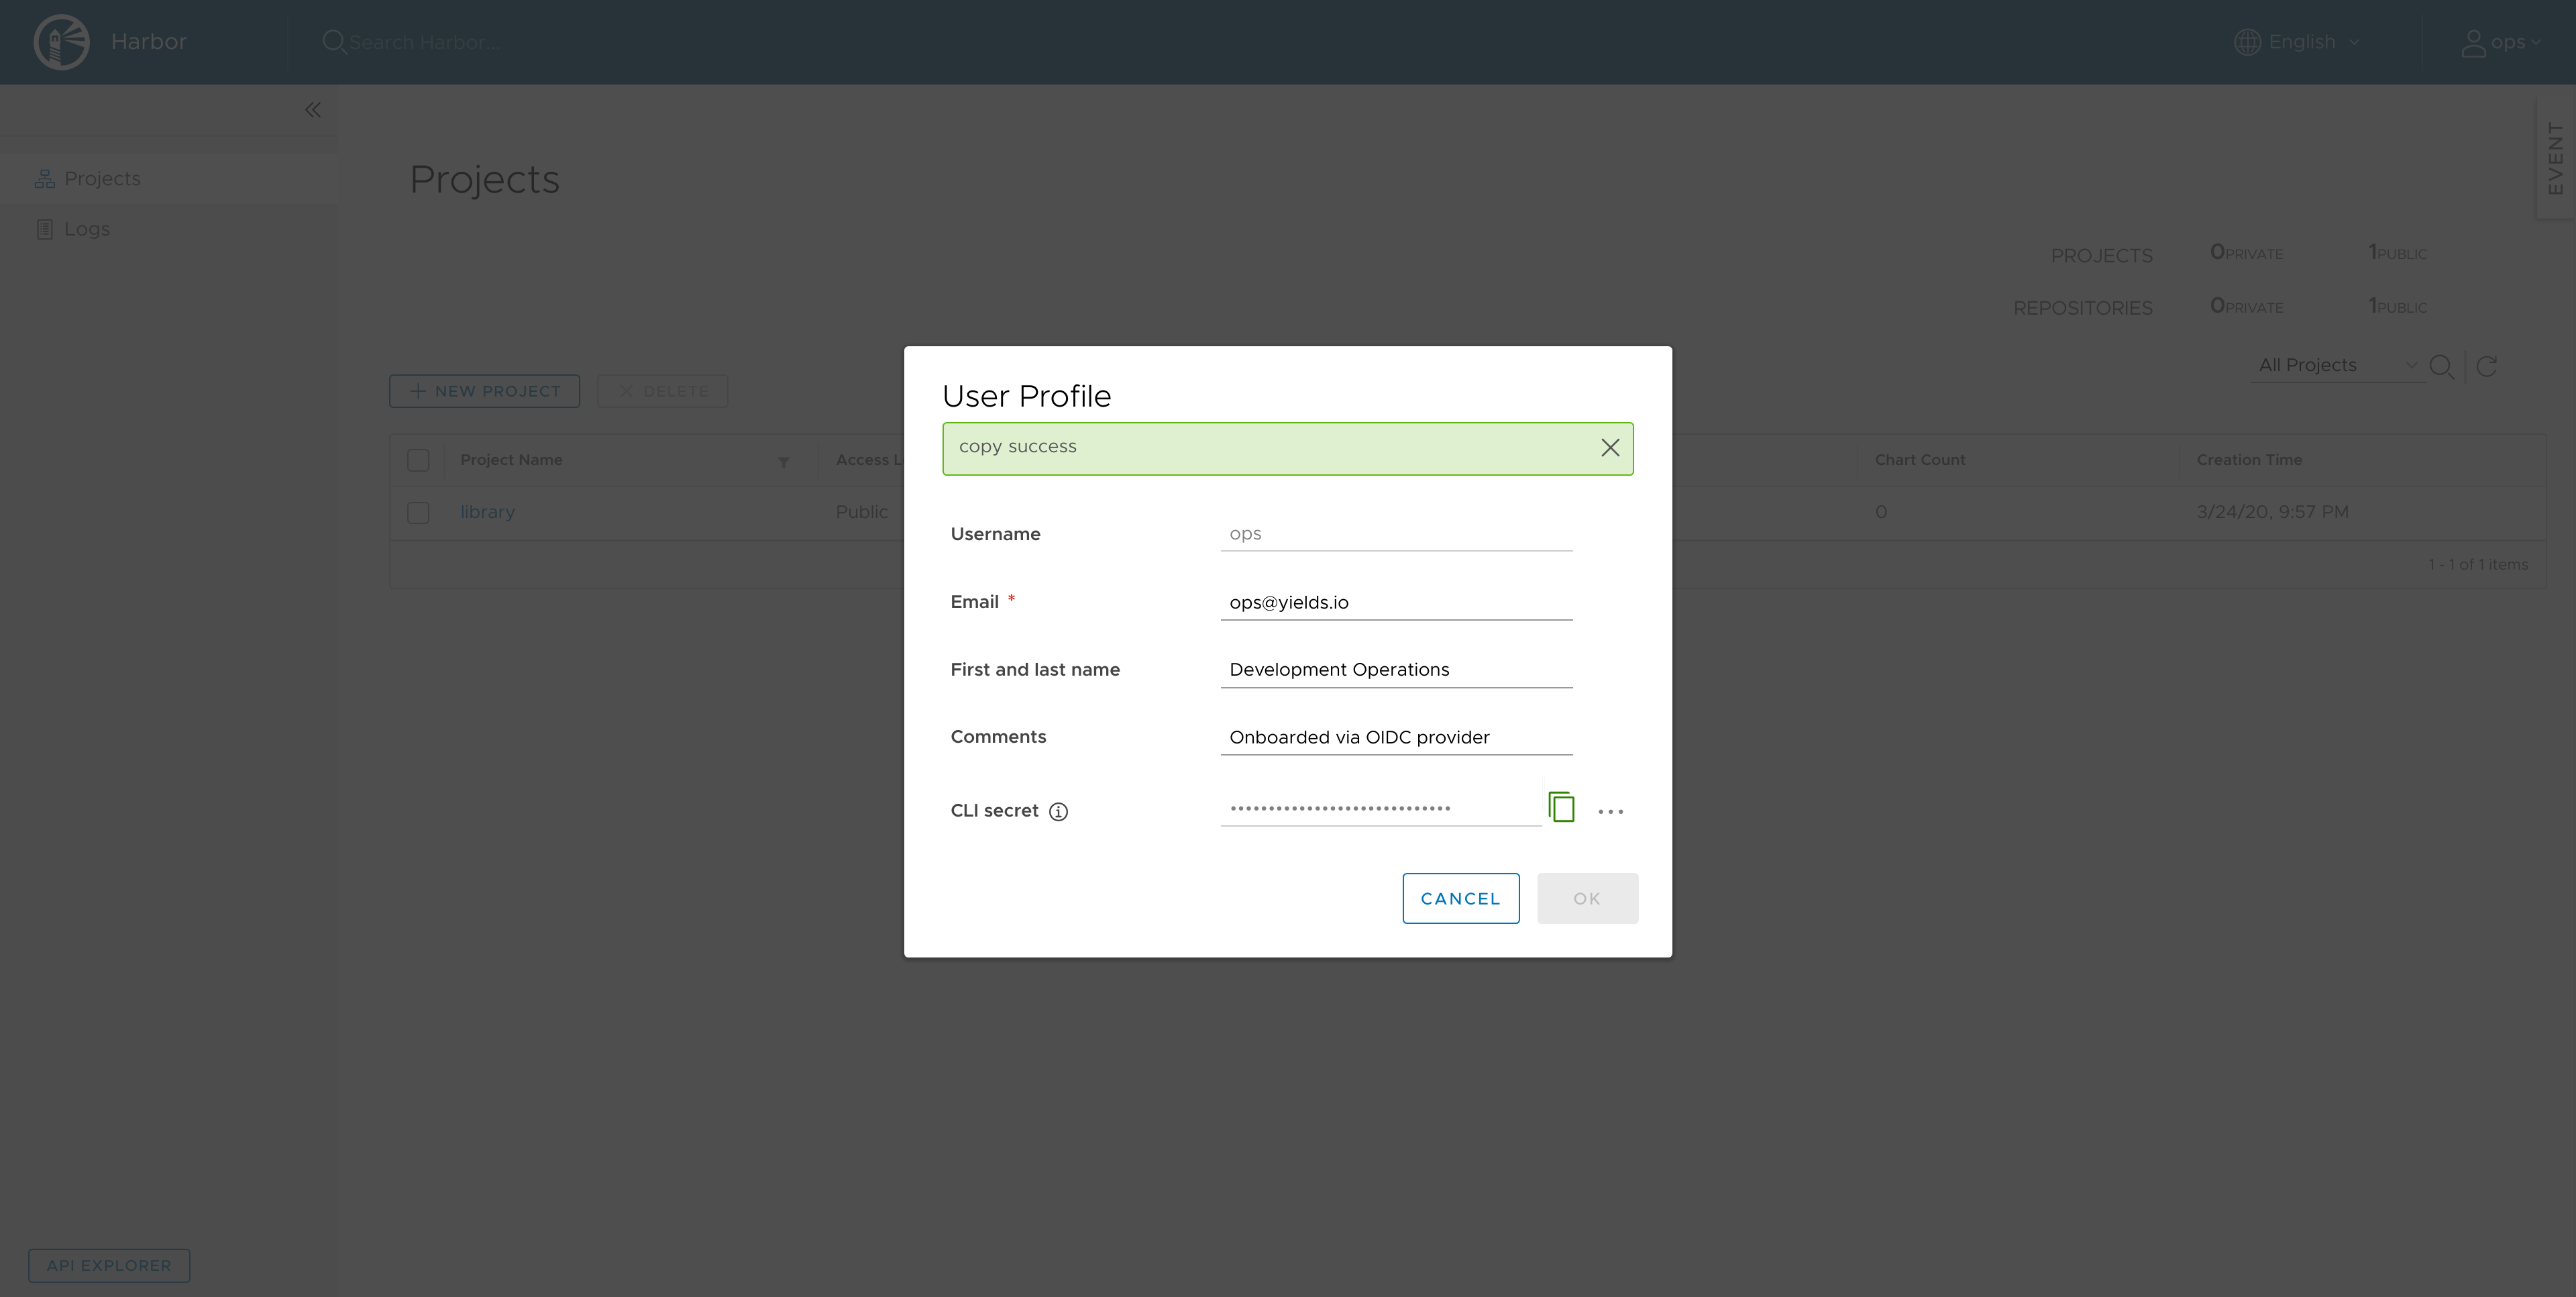
Login to Harbor as the ops user:


-
Copy the CLI Secret for authenticating to the
dockerregistry from the users profile:
-
Login to the
dockerregistry:docker login https://harbor.example.com -u ops -p $CLI_SECRET -
Attempt to push an image:
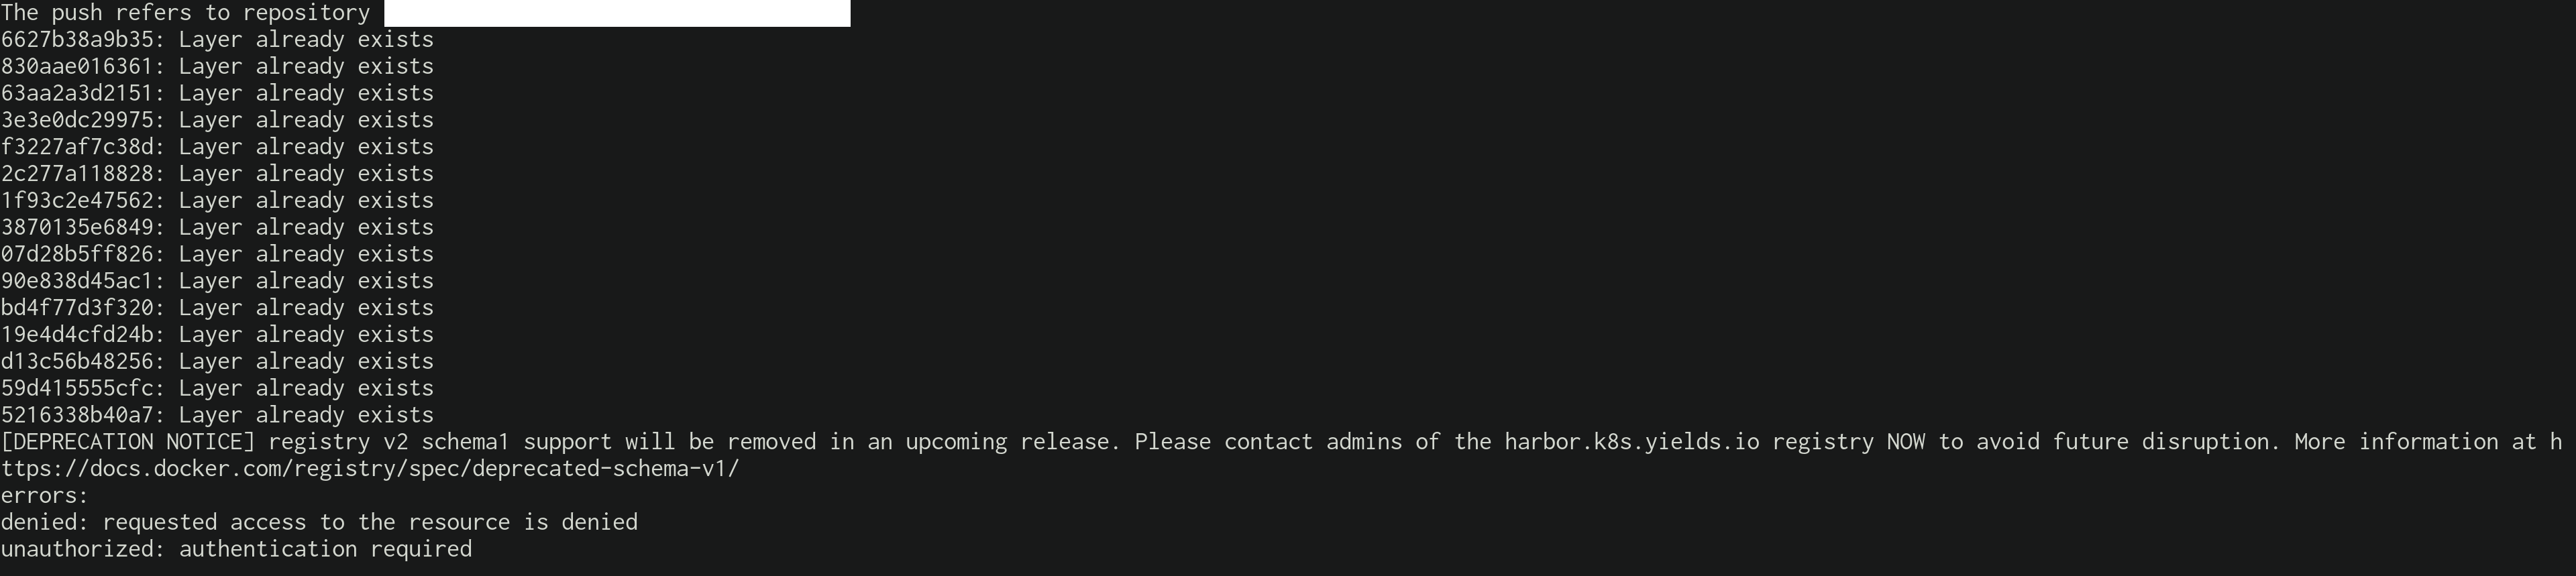
-
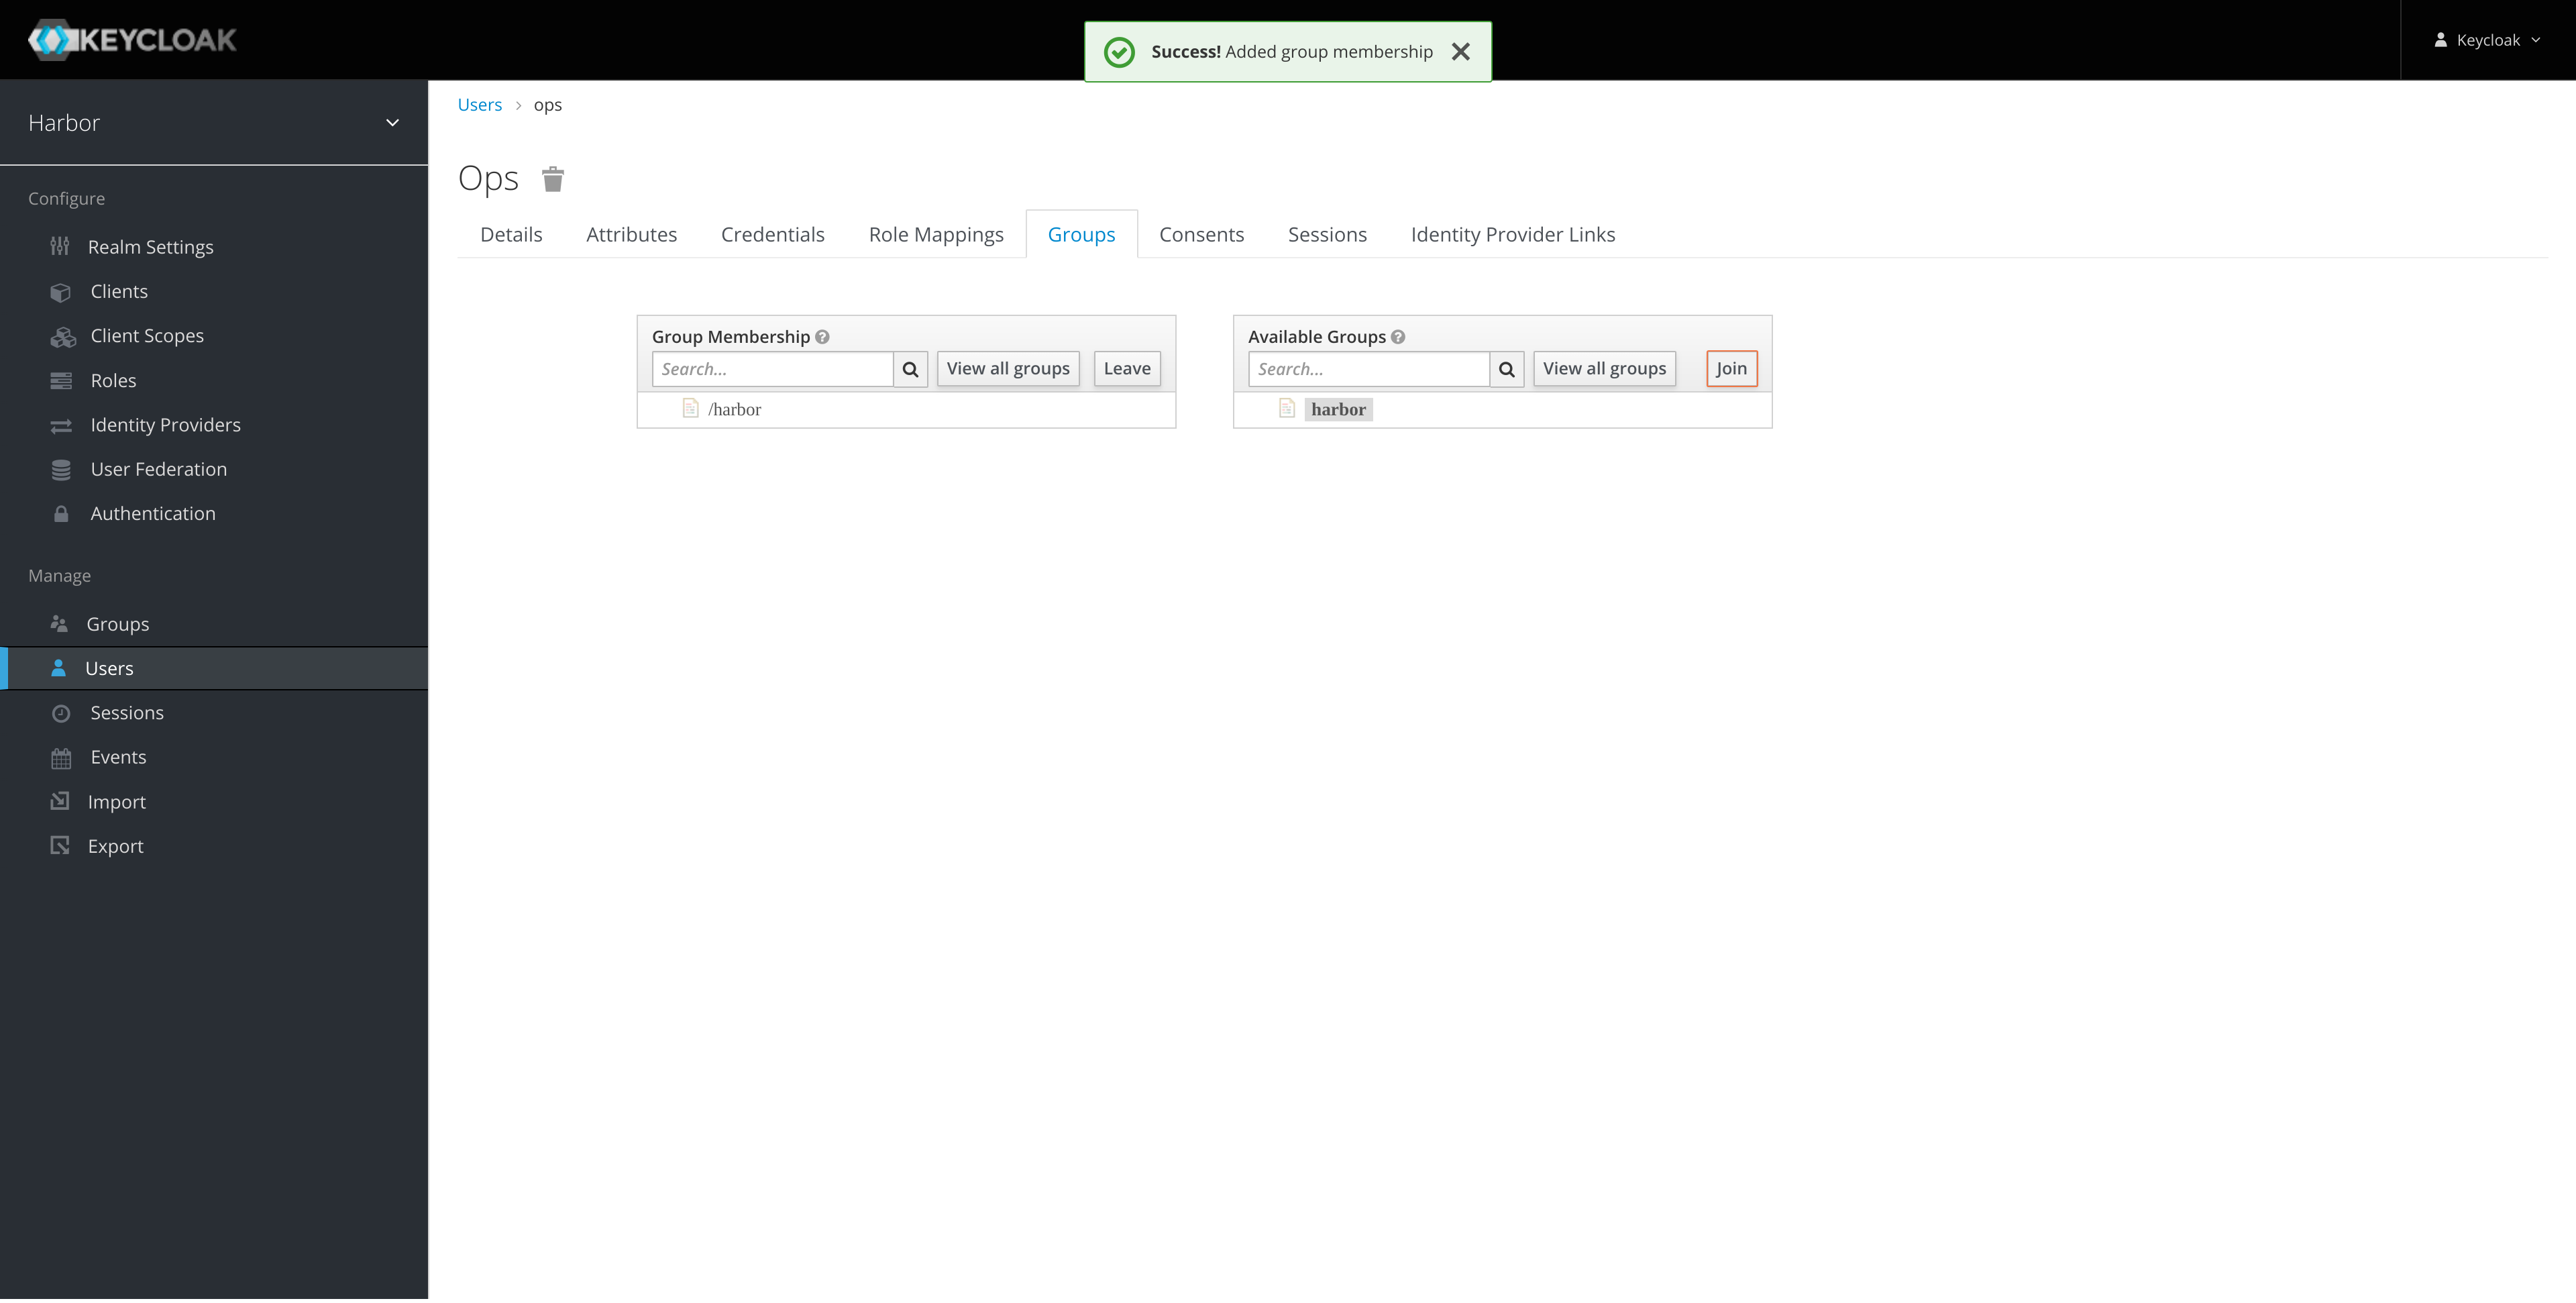
Add the ops user to the harbor group:
-
Configure the registries harbor group membership:
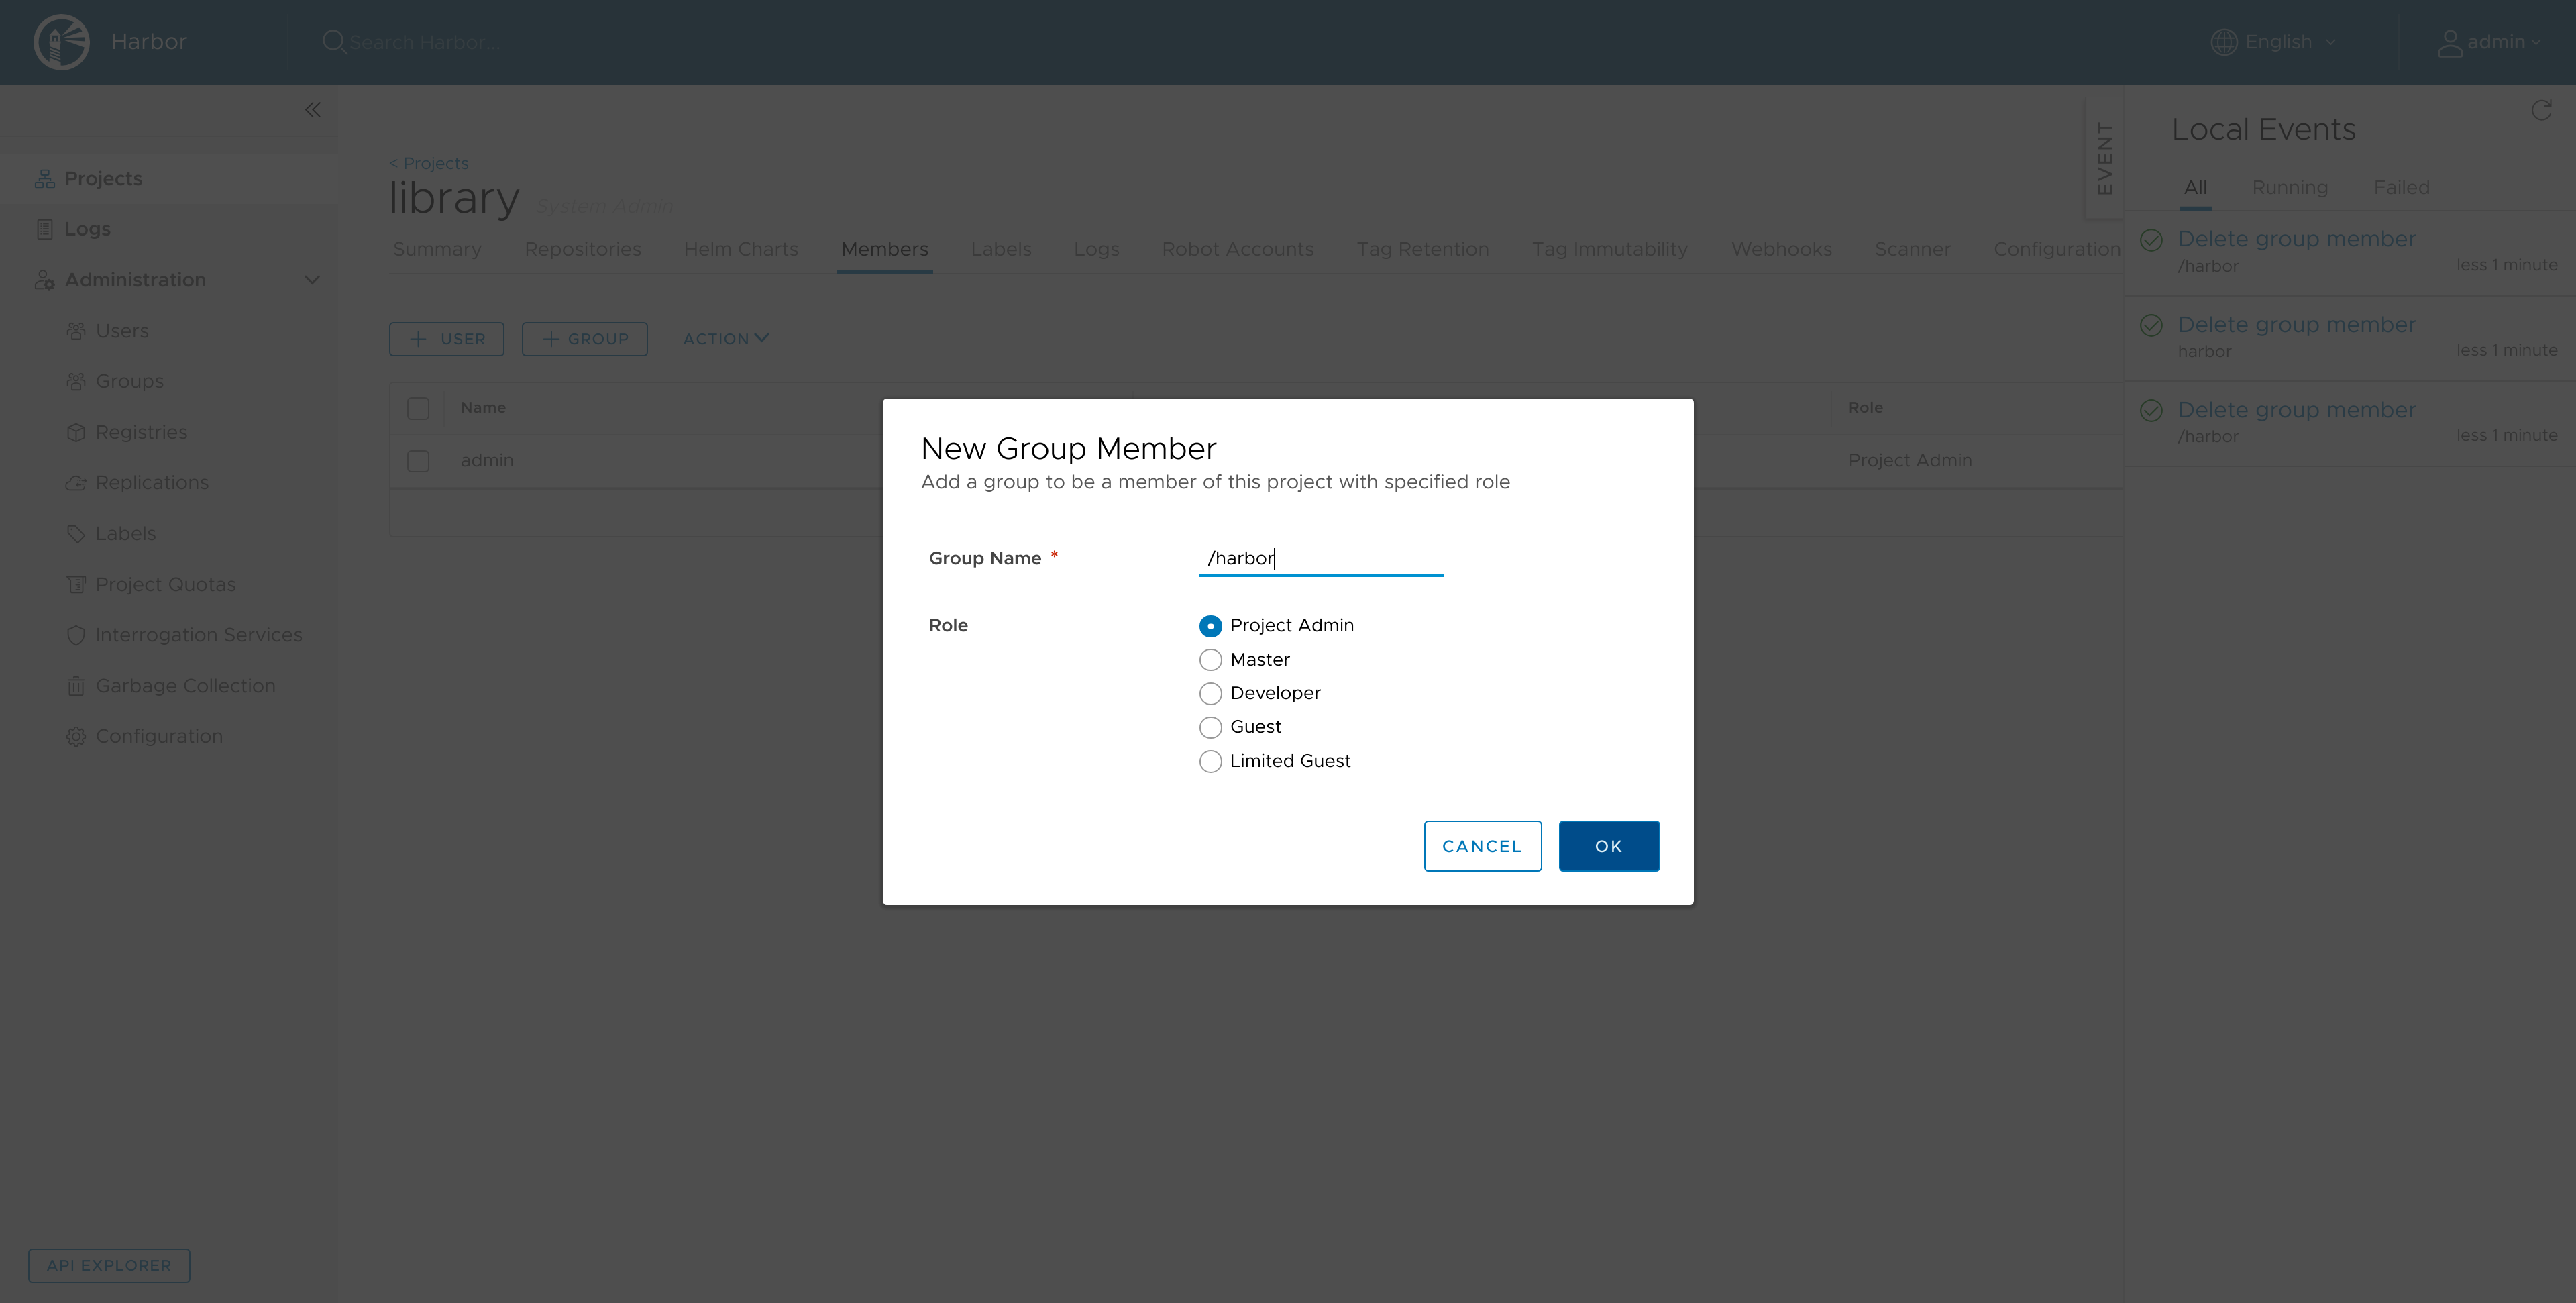
Note: I would advise against adding the group as Project Admin for production deployments.
- Push the image:

Conclusion
I really like the Harbor project, wrapping chartmuseum, docker registries, clair image vulnerability scanning and notary for signing images, so nice! All that with an easy to configure OIDC authentication setup and a stunning User Interface, I'm wow'd. From zero to production in minutes! Next steps: automate all the things!